Follow Me On Social Media!

Cheeseburger Sliders: Irresistibly Juicy and Easy to Make!
Introduction to Cheeseburger Sliders
The mouthwatering allure of cheeseburger sliders brings a delightful twist to the classic burger experience, making them a favorite for any casual gathering or weeknight dinner. Imagine the tantalizing aroma of sizzling beef, the warmth of melted cheese, and fresh toppings, all snugly tucked between soft, inviting buns. These little gems are more than just a bite-sized meal; they encapsulate a sense of fun and camaraderie that resonates deeply with young professionals navigating their busy lives.
Why are cheeseburger sliders the ultimate choice for young professionals? The answer lies in their versatility and convenience. After a long day at work, the last thing you want is to spend hours in the kitchen. Sliders cook quickly and are easy to customize according to your cravings—whether it’s a classic cheeseburger vibe or adding spicy jalapeños for a kick! They also serve as fantastic, crowd-pleasing appetizers for small get-togethers or game nights, allowing you to impress friends without breaking a sweat.
Moreover, the compact nature of cheeseburger sliders means you can enjoy the flavors you love without the heaviness of a full-sized burger. This makes them perfect for balancing a busy life—after all, indulging doesn’t have to be at the expense of your health or time. And let’s not forget about meal prep; these sliders can easily be made in batches and stored in the fridge for a quick bite or lunch on the go.
To elevate the experience even further, consider pairing your sliders with crispy fries or a fresh salad. Mixing and matching sides not only adds variety to your meal but also appeals to different taste preferences.
In a world where young professionals are constantly on the move, cheeseburger sliders offer a satisfying solution that combines flavor, fun, and a bit of ease—all essential ingredients for enjoying life, one slider at a time.
Key Ingredients for Cheeseburger Sliders
Ground Beef
Selecting the right fat content is crucial for delightful cheeseburger sliders. Aim for ground beef with around 80/20 fat for the perfect balance of flavor and moisture. Leaner beef might dry out, while a higher fat content can lead to greasiness. The result is a juicy, flavorful patty that’s sure to satisfy your cravings.
Onions
Fresh minced onions bring a wonderful sweetness and depth to your sliders. Sauté them until they’re translucent to amplify their flavor, adding a delightful bite that complements the savory beef. Onions are an essential component that elevate the overall taste!
Cheese
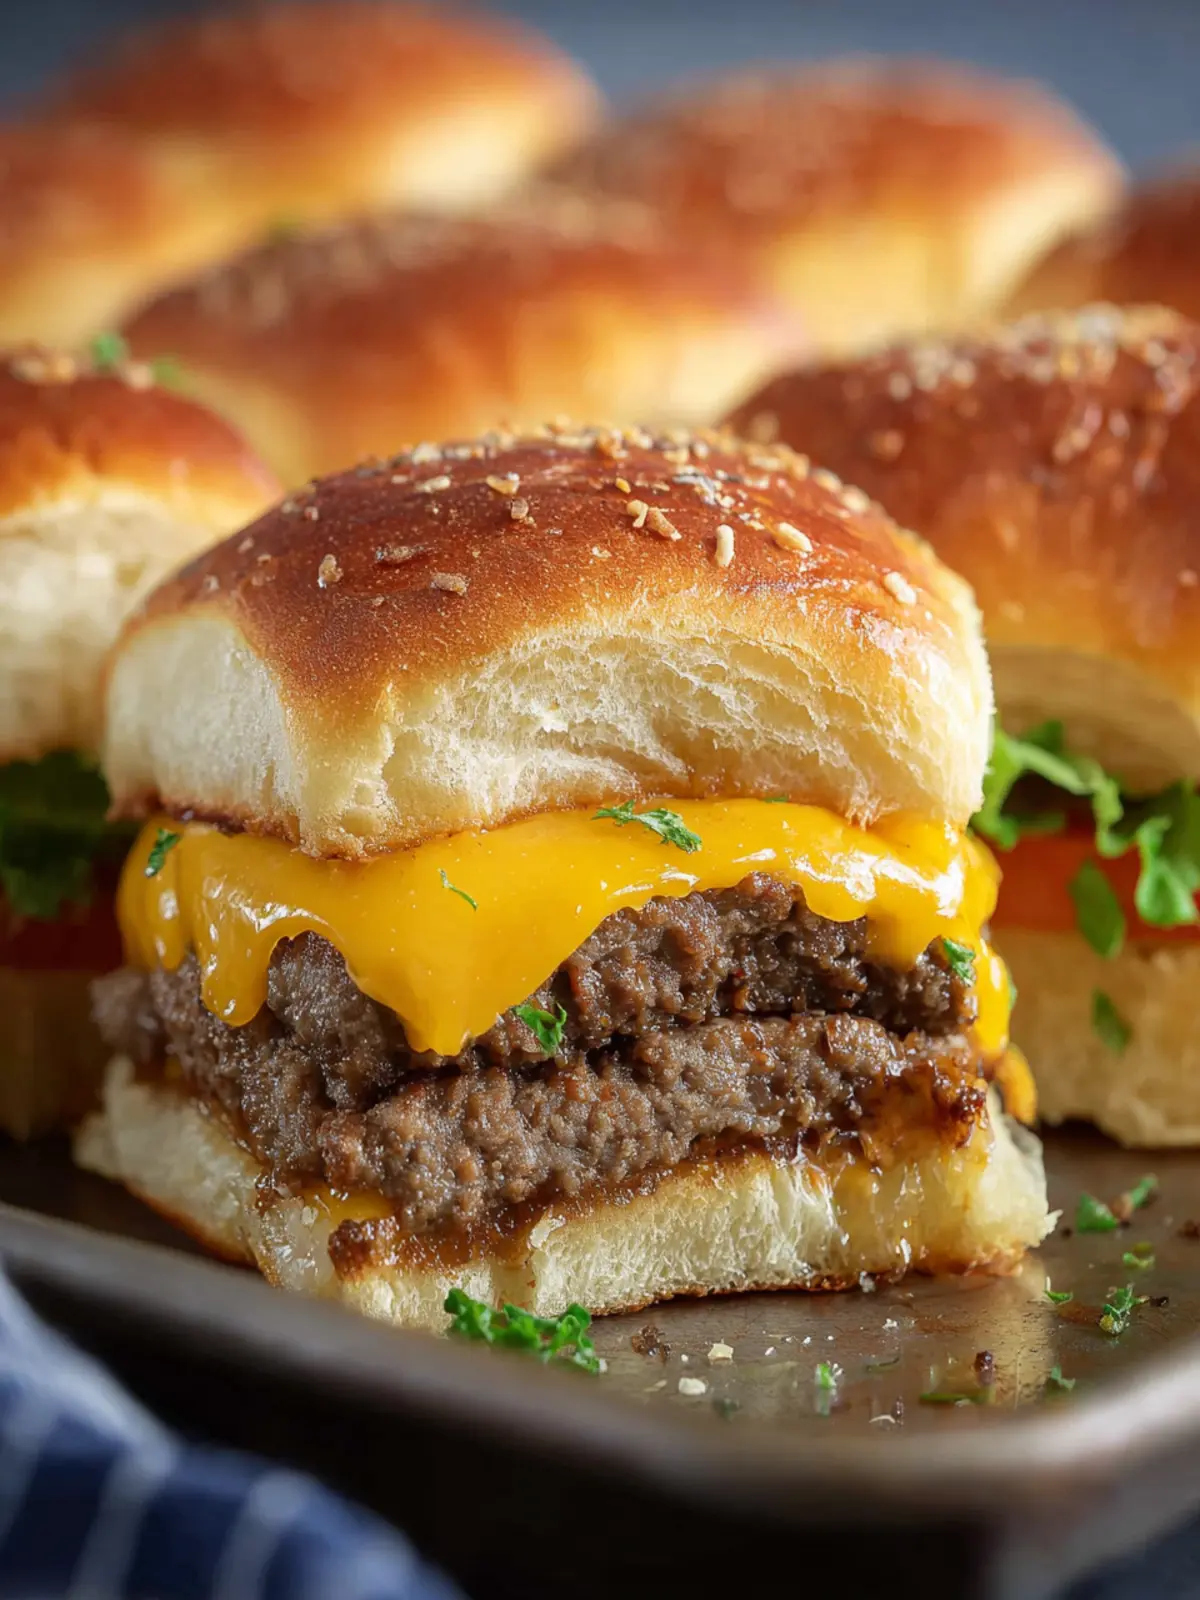
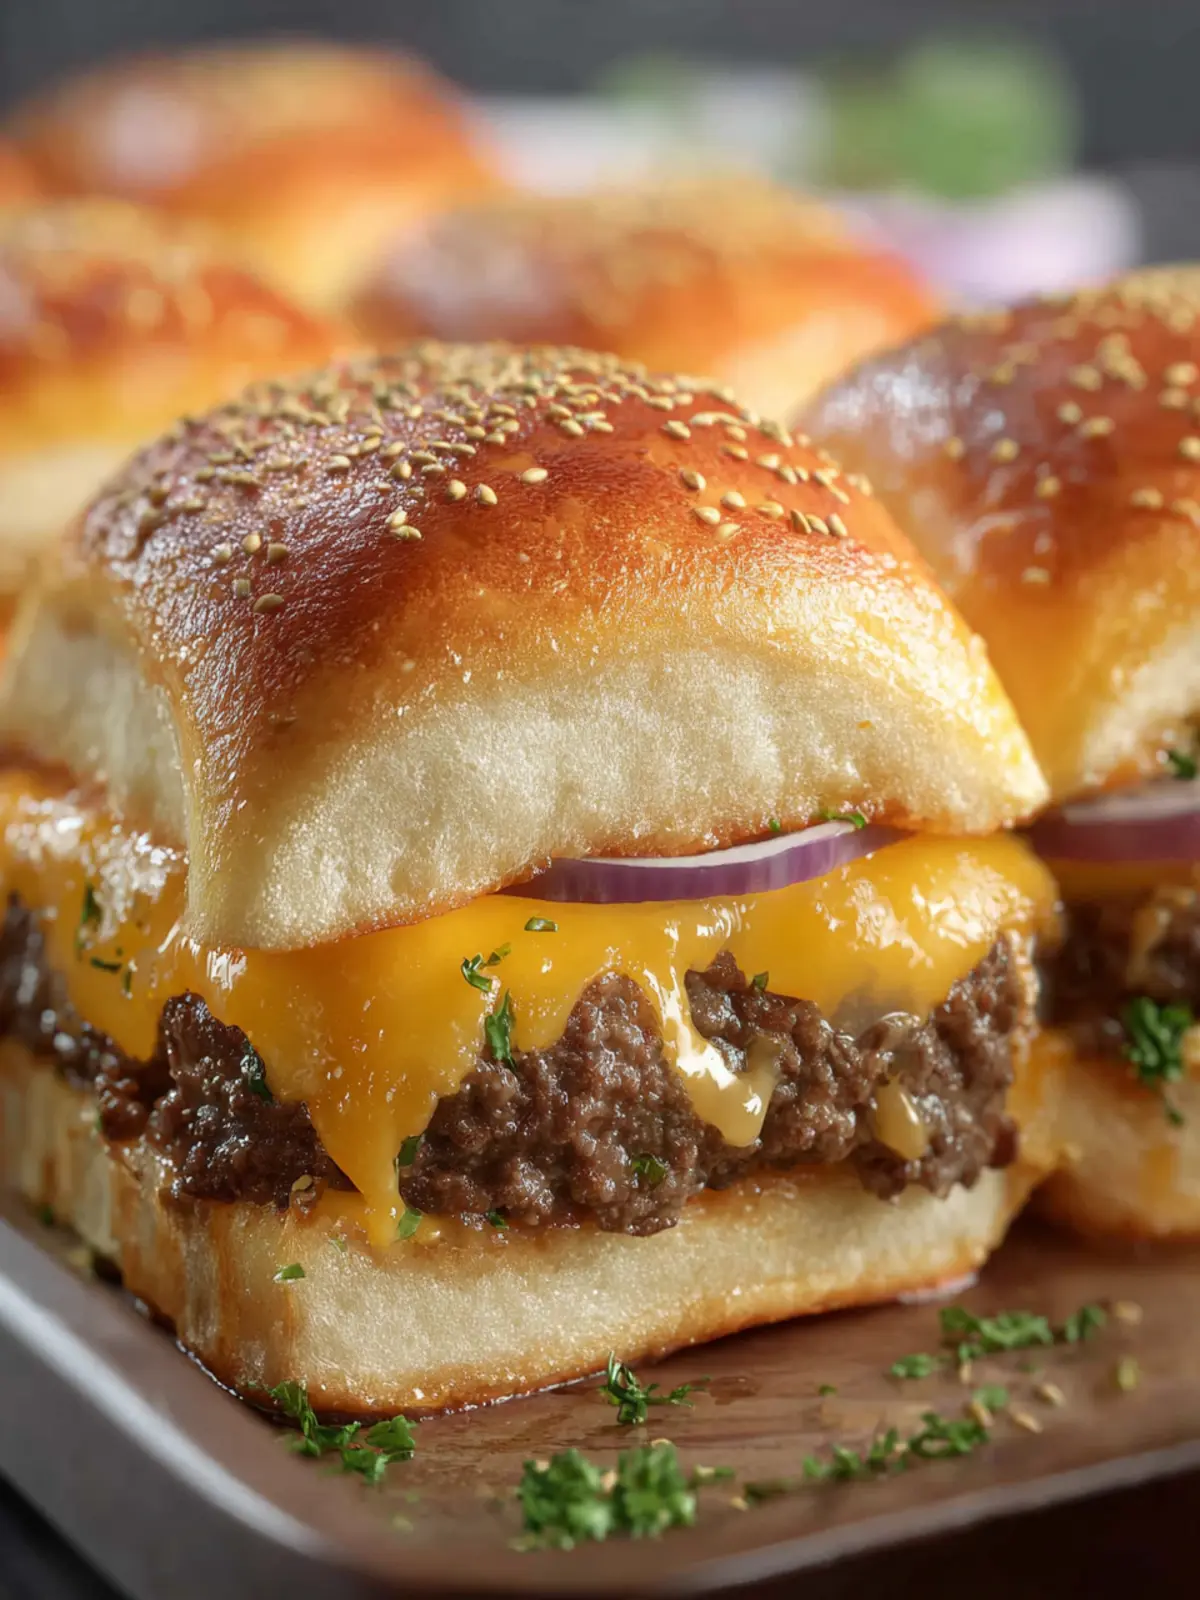
No cheeseburger sliders are complete without cheese. Opt for classic American cheese or your favorite gooey variety. The melting texture creates a rich, savory layer that binds the flavors together, making each bite delightful.
Hawaiian Rolls
Think of Hawaiian rolls as your slider’s best buddy! Their soft, sweet bread provides a delightful contrast to the rich beef and cheesy filling. This ideal base ensures that your sliders are not just tasty, but also hold up well with toppings.
Worcestershire Sauce
A splash of Worcestershire sauce takes the flavor of your beef mixture to another level. It introduces a deep umami quality that enhances the overall taste profile of your sliders, making them irresistible. The secret weapon for a delicious burger experience!
Why You’ll Love These Cheeseburger Sliders
Creating the perfect gathering dish that combines delicious flavors and convenience is easy with cheeseburger sliders. Imagine pulling a tray of these bite-sized delights out of the oven and watching your friends’ faces light up. These sliders pack all the nostalgic flavor of a classic cheeseburger but are perfectly portioned for sharing (or not—no judgment here!).
Perfect for gatherings: Quick to prepare and always a hit!
When you’re hosting friends for game night or a casual hangout, cheeseburger sliders are your best friend. They’re incredibly quick to whip up, allowing you to spend less time in the kitchen and more time enjoying your company. Your guests will love their juicy, cheesy goodness and will undoubtedly ask for seconds. Think about it: who can resist a slider that combines all the elements of a cheeseburger in a perfectly sized package?
Easy to customize: Add your favorite toppings for a personalized touch.
One of the best parts about cheeseburger sliders is their adaptability. You can customize each slider to fit everyone’s tastes—whether it’s extra pickles, a drizzle of spicy ketchup, or a sprinkle of crispy onions. This not only satisfies diverse palates but also sparks fun conversations, as everyone can create their own perfect bite. Next time you’re unsure what to serve, remember that these sliders offer endless possibilities!

Tips for Making the Perfect Cheeseburger Sliders
Creating cheeseburger sliders that steal the show is easier than you might think! Let’s dive into some essential tips that will take your sliders from ordinary to extraordinary.
Experiment with Seasonings
When crafting your cheeseburger sliders, don’t shy away from getting a little creative with seasonings. While salt and pepper are indispensable, consider adding a pinch of paprika or cayenne pepper to give your sliders a delightful kick. A sprinkle of garlic powder or onion powder can also deepen the flavor profile, making each bite a burst of deliciousness. Get adventurous—your taste buds will thank you!
Toast the Rolls
Perfectly toasted rolls can elevate your cheeseburger sliders to a whole new level. Start by melting some butter and mixing in a bit of minced garlic, then generously spread this mixture on both sides of the slider buns. A quick toast on a skillet or in the oven provides a satisfying crunch and enhances the flavor, creating an irresistible combination of textures. The crispy edges will hold up nicely when you stack your juicy sliders, keeping everything intact until the last bite.
With these tips in your back pocket, you’re well on your way to impressing friends and family with your next slider masterpiece!
Time Breakdown for Cheeseburger Sliders
Preparing cheeseburger sliders is not only delicious but also a quick and fun culinary adventure. Let’s break down the time you’ll need so you can easily plan your meal!
Preparation time
Setting the stage for these sliders takes about 15 minutes. This includes chopping toppings, mixing ingredients, and shaping your juicy burger patties.
Cooking time
Once fabulous aromas fill the kitchen, the cooking and baking process takes roughly 25 minutes. This includes cooking the patties on the stovetop and baking them to perfection in the oven.
Total time
In total, you’ll be dedicating about 40 minutes to create and enjoy your cheeseburger sliders. With a bit of organization in the kitchen, this hearty snack can quickly be on your table!

Nutritional Information for Cheeseburger Sliders
Calories
When it comes to cheeseburger sliders, each slider packs an approximate caloric punch of around 250 calories, making them a delightful addition to any gathering. The total calorie count can vary based on ingredients and portion sizes, so it’s great to keep track if you’re watching your intake.
Protein
These scrumptious sliders are not just tasty; they also contribute substantially to your protein needs. With about 12 grams of protein per slider obtained from the beef and cheese combination, they provide an excellent source of sustenance, making them ideal for a quick meal or snack.
Sodium
While indulging in cheeseburger sliders, it’s wise to be mindful of sodium content. Each slider contains approximately 400 mg of sodium, largely due to the seasoning and cheeses used. For those monitoring their sodium intake, consider adjusting seasonings or opting for lower-sodium cheese options without sacrificing too much flavor.
FAQs About Cheeseburger Sliders
Creating a batch of mouthwatering cheeseburger sliders brings excitement to game nights, potlucks, or even a cozy dinner. Whether you’re a seasoned chef or a kitchen novice, it’s natural to have a few questions. Let’s tackle some FAQs that can help you get the most out of your slider-making experience.
Can I make these sliders ahead of time?
Absolutely! Preparing your cheeseburger sliders ahead of time can save you a lot of hassle, especially if you’re hosting. You can cook the patties and freeze them, layers of flavors intact, for up to three months. Just reheat them gently in the oven before serving. You can also assemble the sliders (without toppings) and store them in the fridge for up to a day. When ready to serve, pop them in the oven to achieve that perfect melt.
What are some alternative toppings?
While classic toppings like cheese and pickles steal the show, don’t hesitate to get creative! Here are some fun alternatives:
- Avocado slices or guacamole for a creamy twist
- Sautéed mushrooms and Swiss cheese for a gourmet flair
- Spicy jalapeños and pepper jack cheese for a kick
- Coleslaw for added crunch and texture
Feel free to tailor your toppings to suit your taste or even those of your guests!
How can I make these sliders healthier?
If you’re looking to lighten up your cheeseburger sliders, here are a few simple swaps to consider:
- Use lean ground turkey or chicken instead of beef.
- Opt for whole grain slider buns for extra fiber.
- Load up on fresh veggies like spinach, tomatoes, and onions in place of heavier condiments.
- Consider using Greek yogurt as a substitute for mayonnaise or creamy dressings.
These modifications won’t sacrifice flavor but will make your sliders a bit friendlier to your health goals! Enjoy crafting delightful little bites with these tips!
Conclusion on Cheeseburger Sliders
Cheeseburger sliders are an absolute delight that can transform any gathering into a feast. With their juicy beef patties, melted cheese, and soft, toasted buns, they’re not just a treat, but a crowd-pleaser that everyone will love. Their simplicity and flavor make them a worthy addition to your recipe rotation, whether it’s for a relaxed dinner or a lively party. You’ll appreciate how easy they are to prepare, and your friends will rave about the taste. Don’t miss out on the chance to serve these delicious cheeseburger sliders at your next event; they’re sure to leave a lasting impression!
Print
Cheeseburger Sliders
- Total Time: 35 minutes
- Yield: 12 servings 1x
- Diet: Omnivore
Description
These delicious cheeseburger sliders are perfect for any gathering!
Ingredients
Scale
- 1½ pounds ground beef (85/15)
- 1/2 cup onions (minced)
- 2 teaspoons garlic (minced)
- 1 teaspoon salt
- 1/4 teaspoon black pepper
- 1 tablespoon Worcestershire sauce
- 2 tablespoons mayonnaise
- 2 tablespoons ketchup
- 1 tablespoon mustard
- 12 small Hawaiian rolls
- 1 cup cheddar cheese (shredded)
- 4 tablespoons butter (melted)
- 1/2 tablespoon garlic salt
- 1/4 cup Parmesan cheese (grated)
- to taste pickles
- to taste lettuce
- to taste tomatoes (sliced)
Instructions
- Preheat the oven to 350 degrees.
- In a large skillet over medium heat add the ground beef and minced onion. Cook while stirring until there is only a little pink left in the ground beef – about 5-7 minutes.
- Add the minced garlic and cook for another 2 minutes until fragrant.
- Remove from the heat and stir in the Worcestershire sauce, mayo, ketchup, mustard, salt, and pepper.
- Cut the rolls in half and lay the bottoms out in a single layer onto a baking sheet. Spread the cheeseburger filling evenly over the top of the buns then sprinkle with the shredded cheese.
- Add the tops of the rolls back on and brush with melted butter. Sprinkle with garlic salt and grated Parmesan cheese.
- Cover the sliders with aluminum foil and bake for about 10 minutes, or until the cheese is completely melted.
- Remove the foil and bake for another 5-7 minutes, or until the rolls are golden brown.
- Serve warm with your favorite burger toppings. Enjoy!
Notes
- Feel free to adjust the toppings according to your preference!
- Prep Time: 15 minutes
- Cook Time: 20 minutes
- Category: Appetizer
- Method: Baking
- Cuisine: American
Nutrition
- Serving Size: 1 slider
- Calories: 250
- Sugar: 2g
- Sodium: 600mg
- Fat: 15g
- Saturated Fat: 7g
- Unsaturated Fat: 6g
- Trans Fat: 0g
- Carbohydrates: 18g
- Fiber: 1g
- Protein: 12g
- Cholesterol: 35mg