Follow Me On Social Media!

No Knead Artisan Bread: Easy Homemade Delight Awaits
Introduction to No Knead Artisan Bread
The magic of no knead artisan bread lies in its effortless simplicity, transforming mere flour, water, yeast, and salt into a stunning loaf that rivals any bakery’s creation. Imagine walking into your home and being greeted by the enticing aroma of freshly baked bread, with a crust so golden and crispy, it practically begs you to take a bite. This method isn’t just a baking trend; it’s a game-changer for anyone who dreams of creating their own artisanal bread without the need for time-consuming kneading.
What makes no knead artisan bread so special? It comes down to the three key players: time, hydration, and patience. By allowing the dough to rest for an extended period—typically 12 to 18 hours—you give gluten the chance to develop naturally. This slow fermentation not only enhances the flavor but also leads to that airy crumb and chewy crust that we all love in artisan bread. Unlike traditional bread-making that requires a workout for your arms, this technique requires minimal effort and doesn’t ask you to spend hours at the counter.
Let’s not forget about hydration. The dough’s high moisture content is crucial in achieving that ideal, open crumb structure. A wet dough results in a light, airy bread that boasts a delectable crust, each slice promising a satisfying crunch.
This recipe is perfect for busy young professionals. With just a few minutes of active time followed by a prolonged resting period, you can easily fit the process into your daily routine—after all, you’re probably more than familiar with waiting for bread at your favorite café.
In summary, no knead artisan bread is about rediscovering simplicity in baking. With just a handful of ingredients, a little time, and patience, you can create a loaf that not only looks fantastic but tastes even better. So, grab your apron and let’s bring that charming aroma into your kitchen!
Key Ingredients for No Knead Artisan Bread
Creating no knead artisan bread is a delightful journey that requires just a few essential ingredients, each playing a crucial role in crafting that perfect crust and airy crumb. Let’s dive into these key components that bring this rustic bread to life.
Flour: The backbone of any bread recipe, I recommend using bread flour for its higher protein content. This not only enhances gluten development but also gives your bread a chewier texture. If you’re feeling adventurous, experimenting with whole wheat flour can add a nutty flavor.
Water: The hydration level in your dough is vital. Using warm water—around 100°F—activates the yeast and helps in creating that beautiful rise. It’s like giving your dough a warm hug!
Salt: I’ve found that using kosher salt elevates the flavor profile of the bread. It balances sweetness and helps control yeast activity, ensuring your bread isn’t overly salty but perfectly seasoned.
Yeast: Active dry yeast is perfect for this recipe, as it’s easy to work with and readily available. Just mix it into the dry ingredients and let your dough ferment with minimal fuss.
Each ingredient is a star player in your no knead artisan bread, coming together to create a simple yet remarkably flavorful loaf. Happy baking!
Why You’ll Love This No Knead Artisan Bread
Creating your own no knead artisan bread is like taking a small vacation in your kitchen. The experience is simple yet incredibly rewarding. Imagine the aroma of freshly baked bread wafting through your home, and the anticipation of tearing into a crusty loaf with a soft, warm center. You don’t have to be a professional baker to make this masterpiece; the no knead technique allows everyone to shine in their culinary endeavors.
Minimal Effort, Maximum Flavor
One of the best parts about this recipe is how little work it requires. Simply mix the ingredients and let time do its magic. The long fermentation process allows the dough to develop complex flavors without the need to knead. It’s perfect for busy professionals who cherish good food but can’t always spare hours in the kitchen.
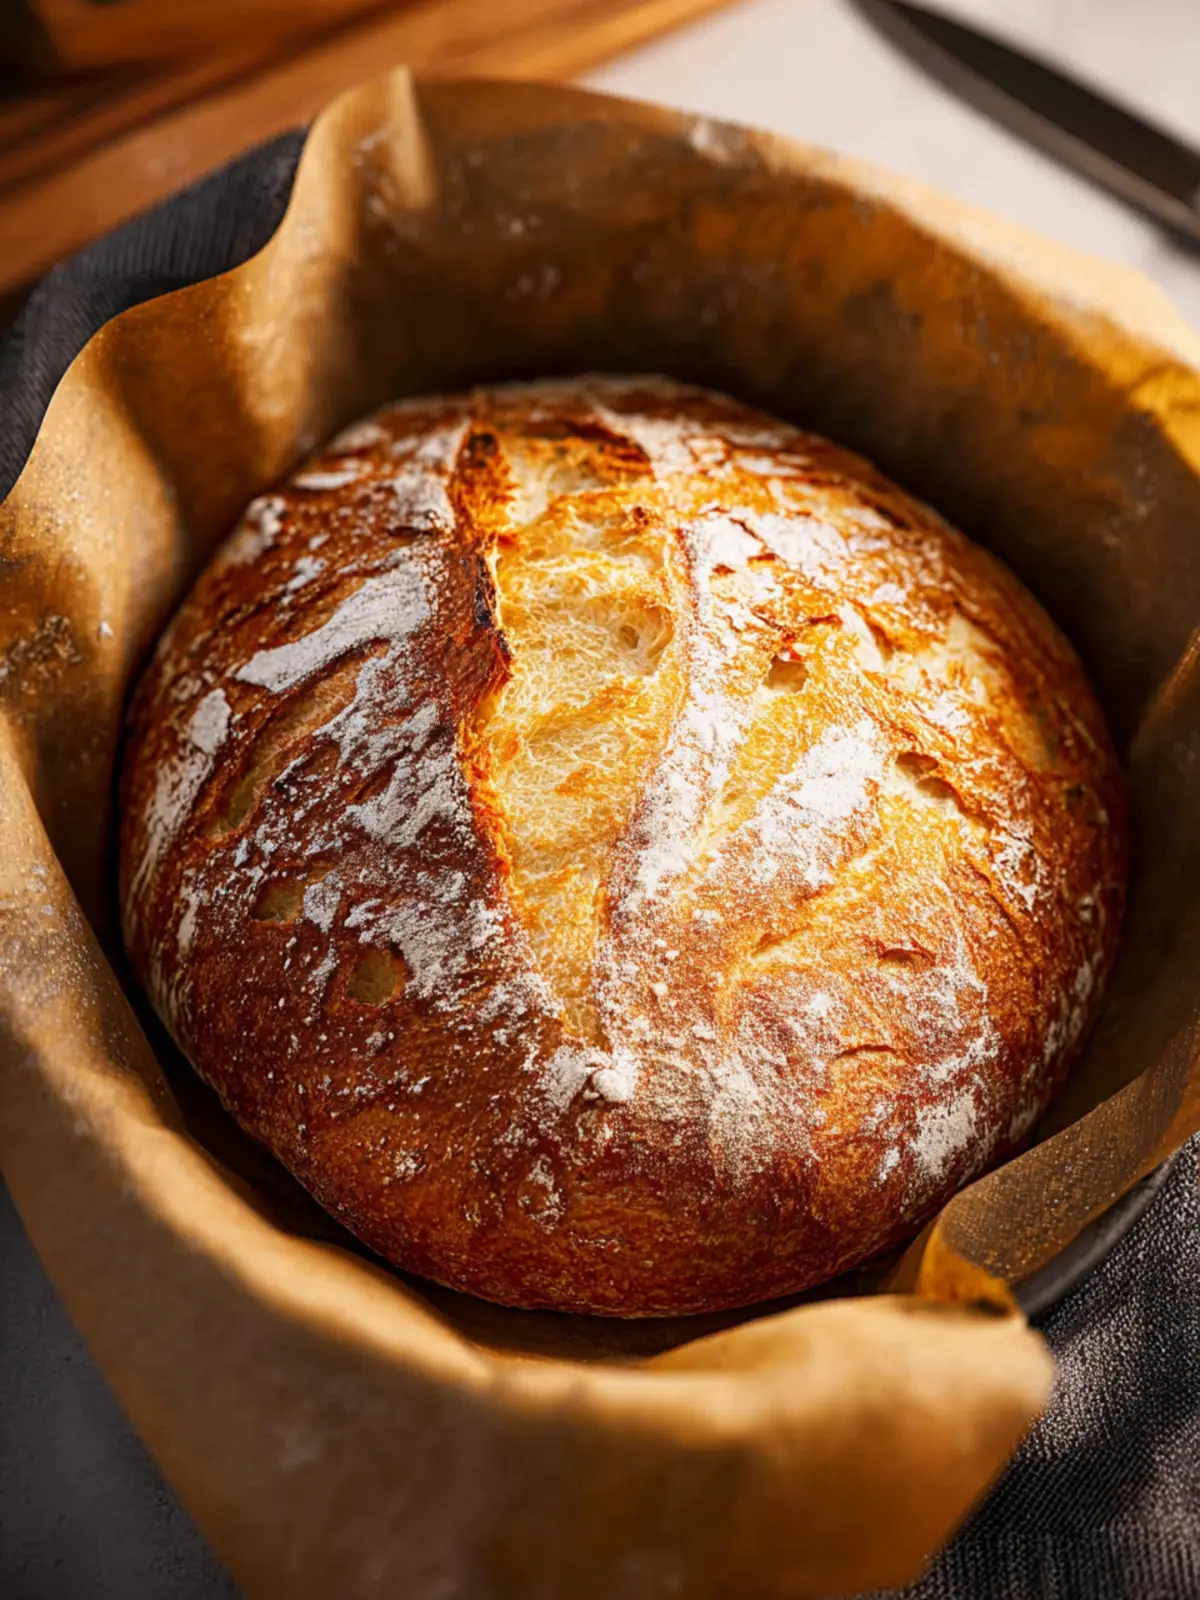
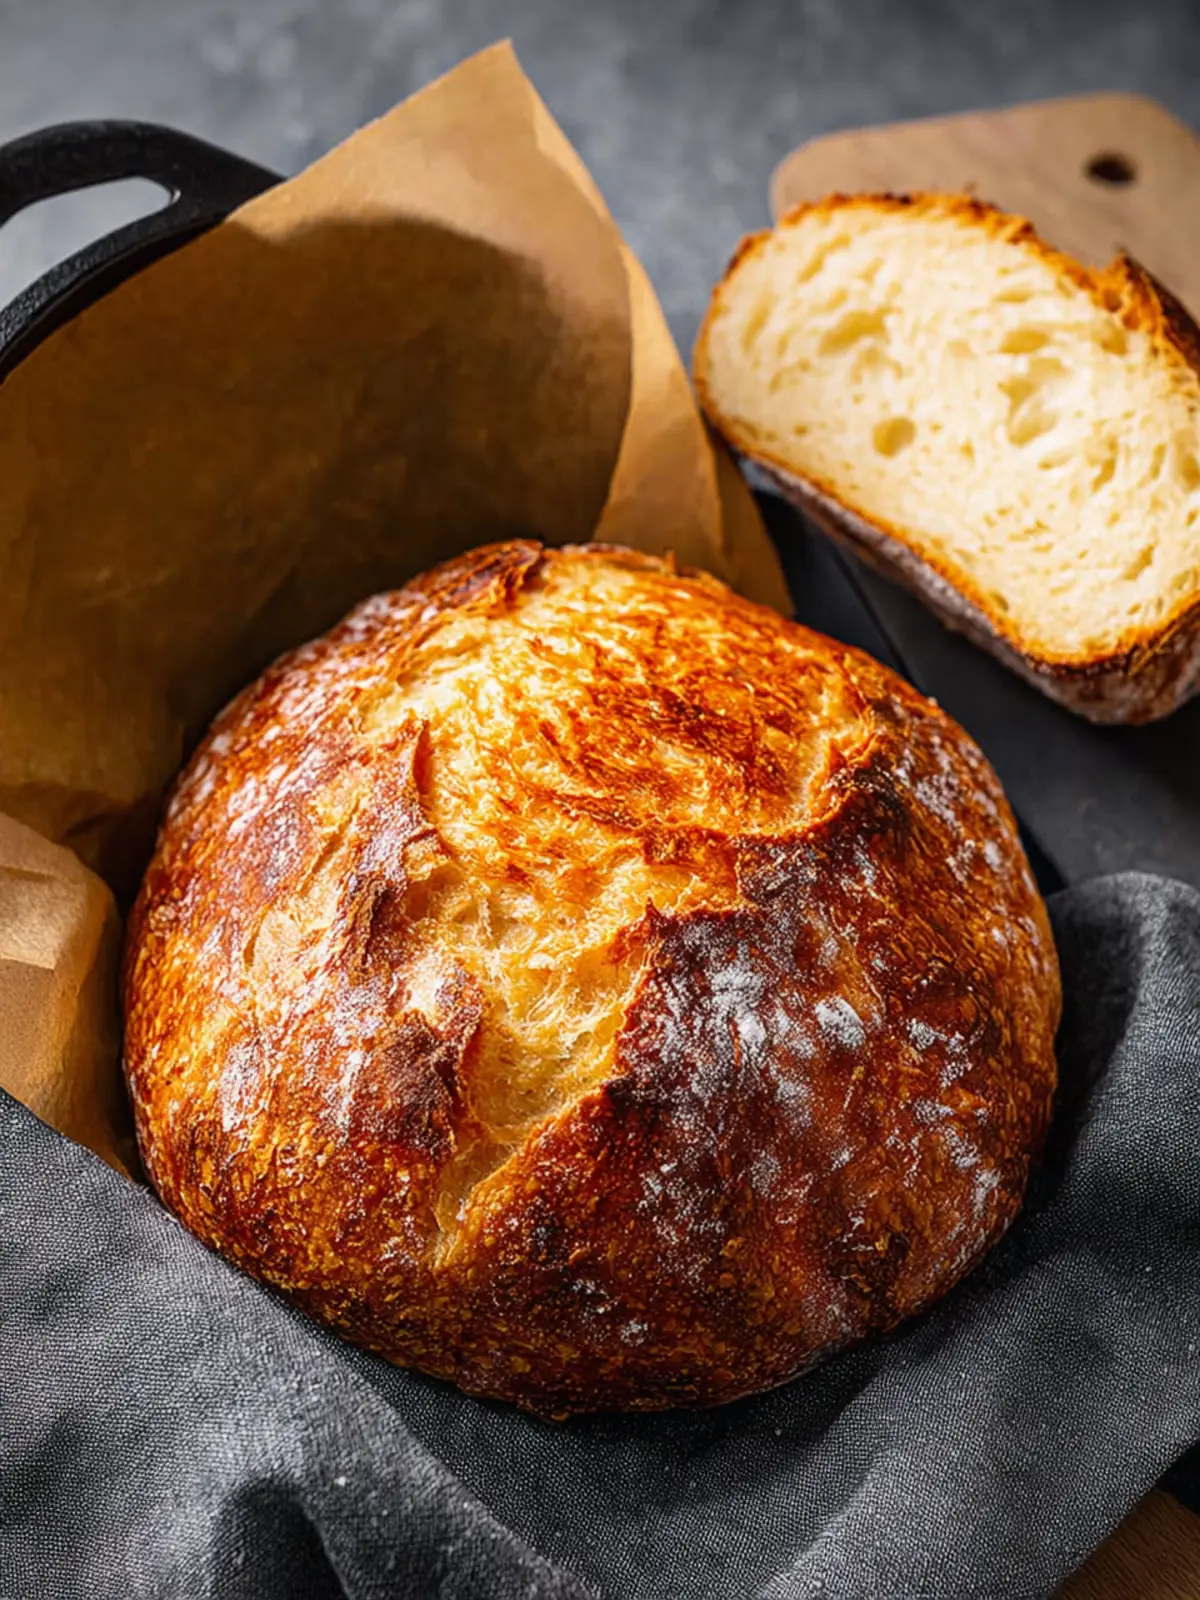
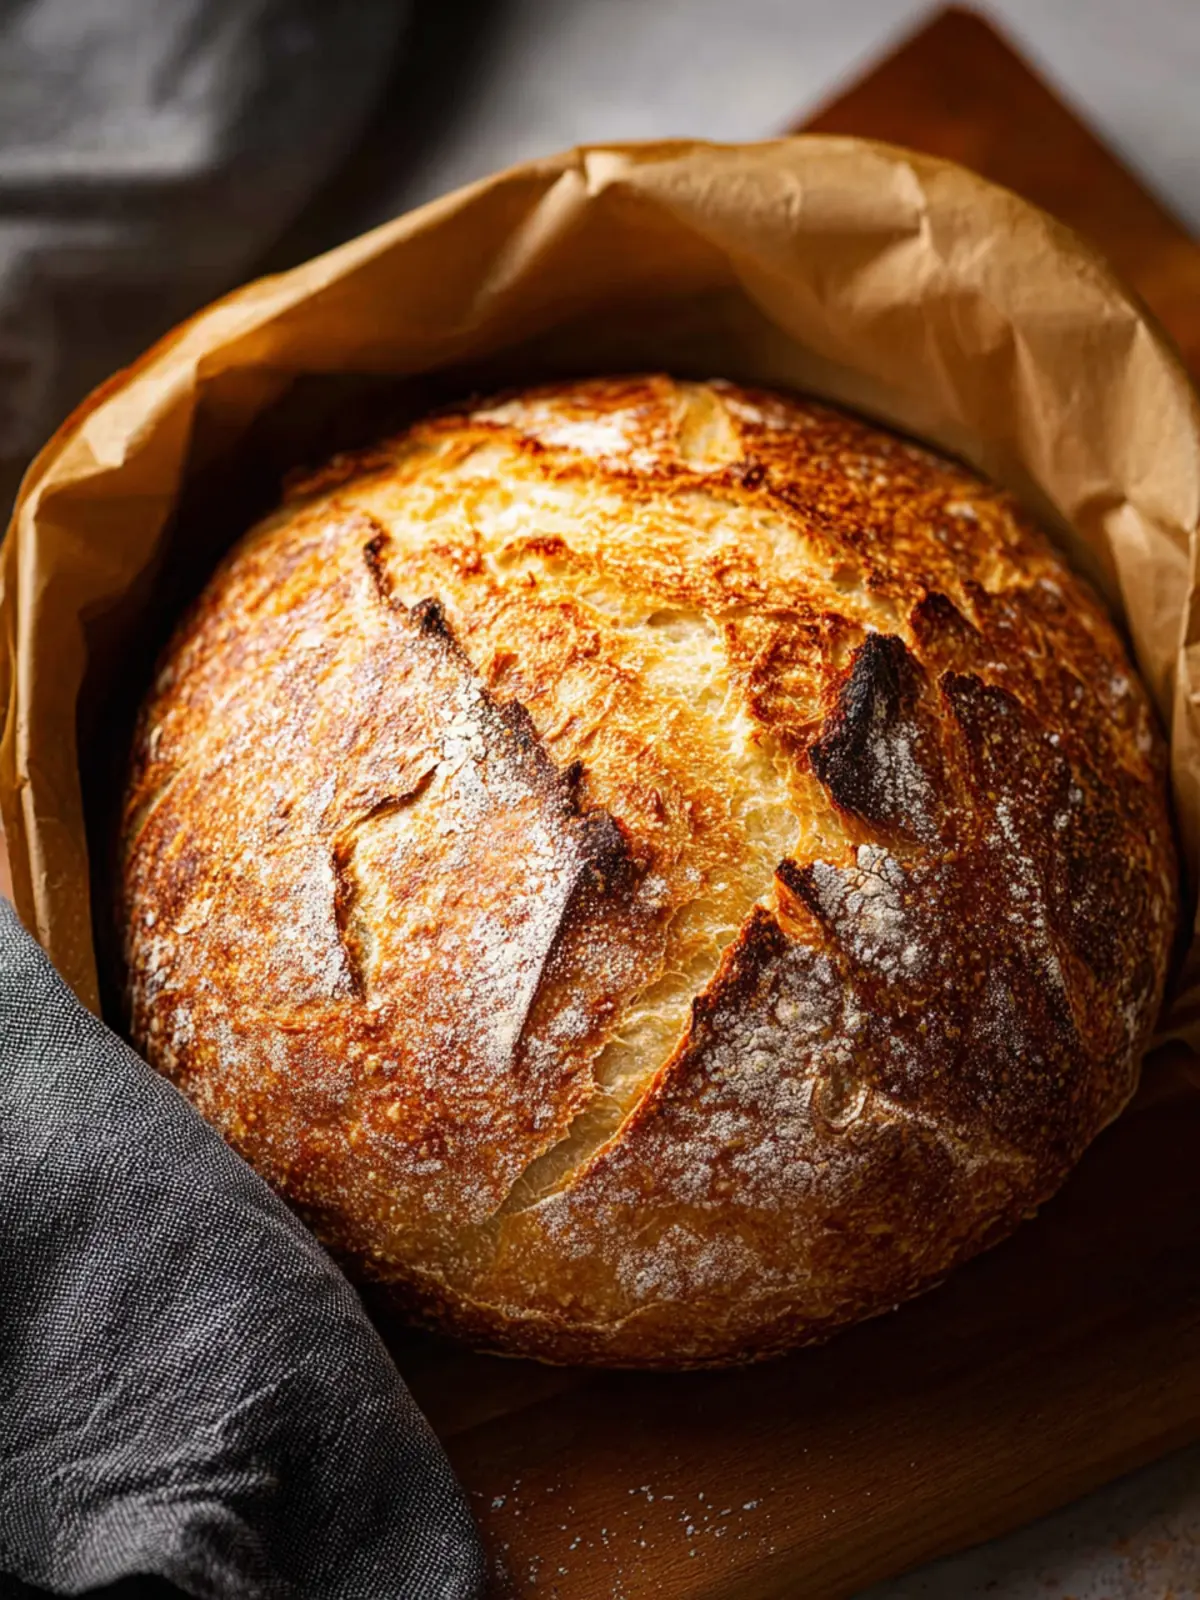
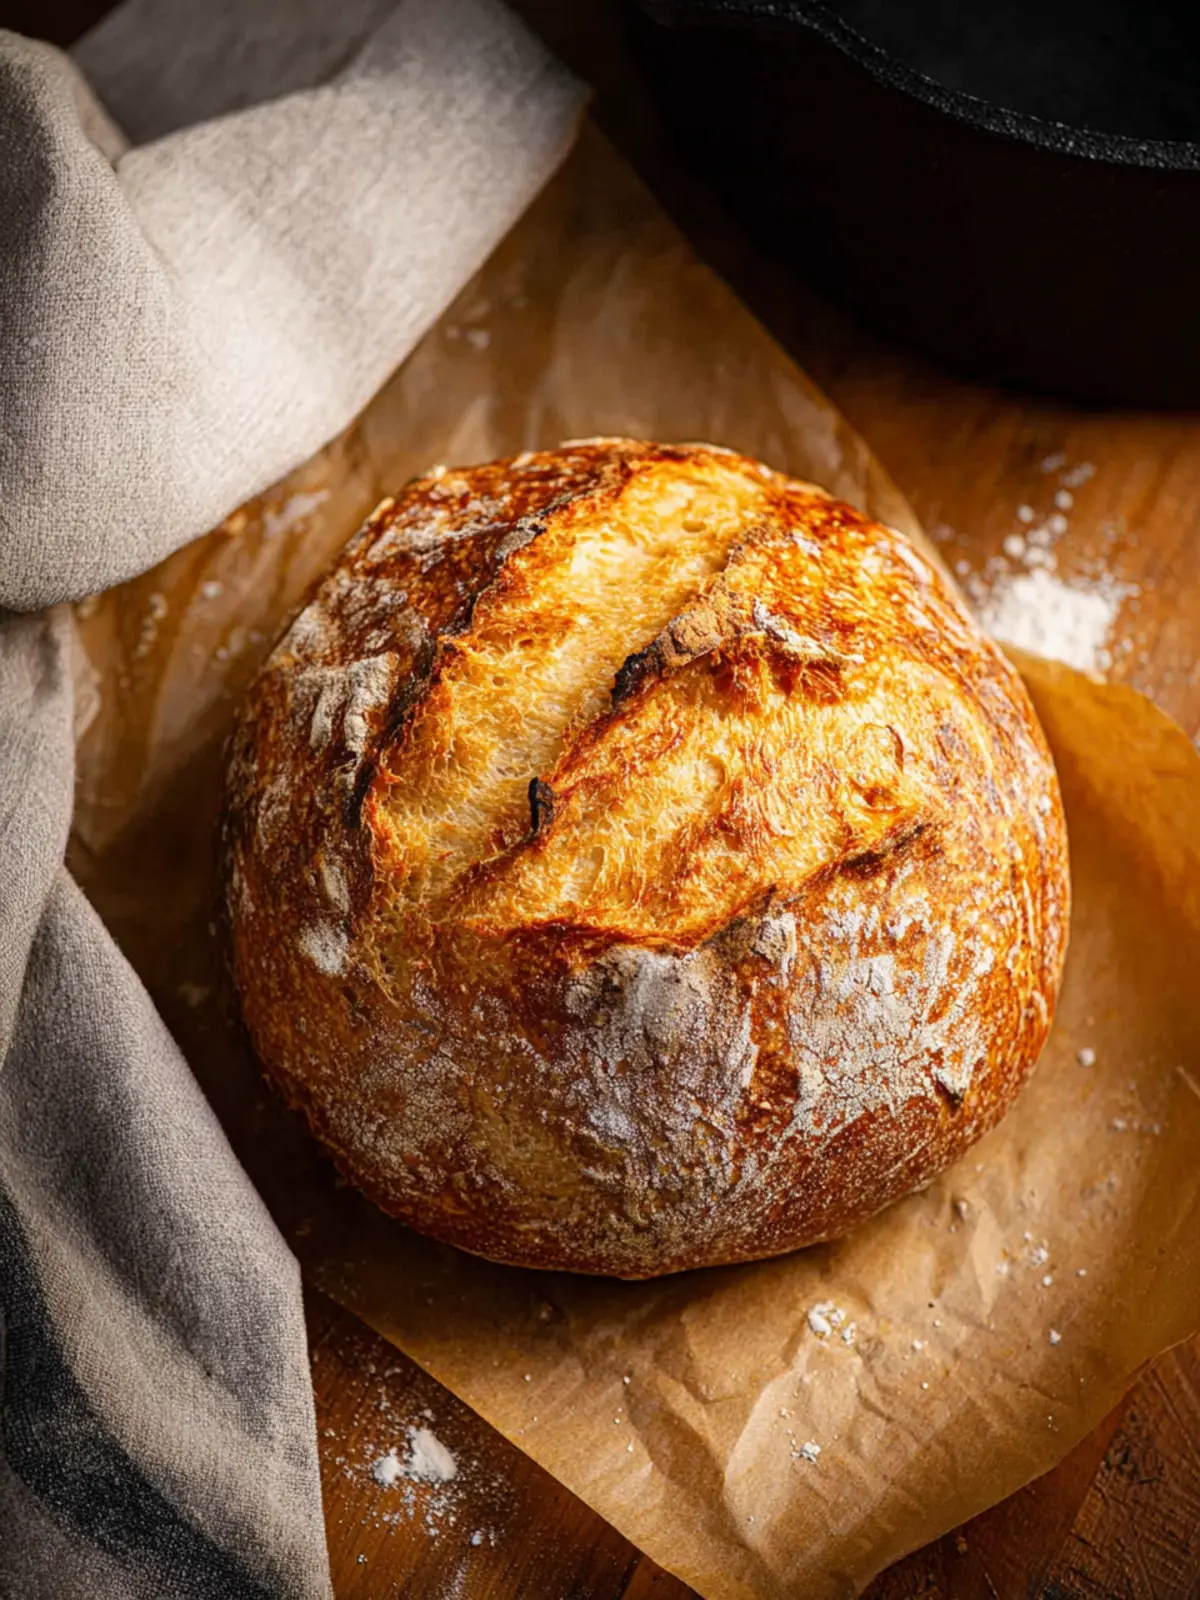
Perfectly Crusty Exterior
When you pull your loaf out of the oven, you’ll be greeted with a beautifully golden crust that crackles when you slice it. This contrast between the crunchy exterior and the pillowy interior is something that store-bought bread simply can’t compete with.
Versatile and Customizable
Feel free to get creative! Add herbs, cheese, or nuts to the dough to cater to your taste preferences. Every batch can be a new adventure, inviting you to experiment and discover your favorite variations.
With this no knead artisan bread, you’ll not only impress your friends and family at gatherings but also enjoy a little slice of heaven right at home.
Tips for Making Perfect No Knead Artisan Bread
Creating no knead artisan bread can feel daunting at first, but with a few insider tips, you can master this effortless method and bake a loaf that would impress any bakery. The beauty of this bread lies in the simplicity of the technique, allowing flavors to bloom without intense effort.
Choose the Right Flour
Using high-protein bread flour is key to achieving that delightful chew and structure. All-purpose flour works too, but bread flour gives a better rise and texture. A blend of flours can also add unique flavors.
Hydration is Key
A wetter dough leads to a more open crumb and that coveted artisan texture. Don’t be afraid if your dough feels sticky—that’s a good sign! Just ensure that you have enough flour to prevent sticking when shaping.
Let It Rise
Patience is your ally. Allow your dough to rise for at least 12 hours. This slow fermentation process enhances flavor and creates those lovely air pockets we admire in bread.
Use a Dutch Oven
Baking your no knead artisan bread in a preheated Dutch oven traps steam, resulting in a crust that’s both crispy and golden. It mimics professional baking conditions right at home.
Enjoy the process, and remember: the more you make this bread, the better it will become! Happy baking!
Time Details for No Knead Artisan Bread
Creating no knead artisan bread is a delightful activity that fits seamlessly into your week, specially crafted for those who crave that perfect homemade loaf without the elbow grease.
Preparation Time
Set aside about 15 minutes for mixing the ingredients. This no-fuss approach allows you to focus on enjoying the process rather than laboring over it.
Rising Time
The magic happens during the rising process, which takes about 12 to 18 hours. This long fermentation develops flavor and that wonderfully airy texture we love in artisan loaves.
Baking Time
Once your dough has risen, preheat your oven and bake your loaf for approximately 30 to 45 minutes. Keep an eye on it; you want that lovely crust to form!
Total Time
In total, expect about 12 to 18 hours + 45 minutes for baking. While it may feel like a wait, the results will be more than worth it! This bread isn’t just a meal; it’s an experience.
Nutritional Information for No Knead Artisan Bread
Understanding the nutritional information for your homemade no knead artisan bread can enhance your enjoyment and help you make mindful dietary choices. This delightful bread is not only a treat for the taste buds, but it also offers a solid nutritional profile.
Calories
A single slice of no knead artisan bread typically contains around 120 calories. This makes it a satisfying base for your favorite toppings or sandwiches without overwhelming your daily calorie intake.
Protein
Each slice packs about 4 grams of protein, which is essential for maintaining muscle health and keeping you feeling full longer. Pairing your bread with a protein-rich topping can create a balanced and nutritious meal.
Sodium
One slice contains approximately 200 mg of sodium. While this is relatively moderate, it’s always good to be mindful of your overall sodium intake, particularly if you’re watching your salt consumption for health reasons.
FAQs about No Knead Artisan Bread
Creating the perfect no knead artisan bread invites a delightful experience in your kitchen, but questions often pop up along the way. Let’s tackle some common queries to guide you through this baking adventure!
What do I do if my dough doesn’t rise?
If your dough for no knead artisan bread isn’t rising, there could be a couple of reasons behind this. First, ensure you’ve used fresh yeast—expired yeast might not activate properly. Temperature plays a significant role too; your kitchen should be warm enough for the yeast to work its magic. If it’s too cold, try placing the dough in a slightly warm oven or covering it with a warm damp cloth. Lastly, be patient! The magic of no-knead bread is in its long fermentation; sometimes dough just needs a bit more time.
Can I add herbs or spices to the dough?
Absolutely! Adding herbs or spices to your no knead artisan bread can enhance its flavor profile significantly. A sprinkle of rosemary or thyme can bring a savory note, while spices like garlic powder or even a hint of chili powder can lend a unique twist. Just be mindful of the quantities—as with any recipe, balance is key. Experiment with flavors that you love; the beauty of this bread is its versatility!
How do I store leftover bread?
Storing leftover no knead artisan bread is straightforward. For short-term storage, wrap the loaf in a clean kitchen towel and keep it at room temperature, where it can stay fresh for a couple of days. If you want to keep it longer, slice the bread and place it in a resealable plastic bag or airtight container, then store it in the freezer. Just pop it in the toaster or oven for a few minutes to revive that crispy crust when you’re ready to enjoy it again!
Conclusion on No Knead Artisan Bread
Creating no knead artisan bread is not just about baking; it’s about engaging with the process and experiencing the joy of crafting something delicious from simple ingredients. With minimal effort and planning, anyone can produce a crusty, flavorful loaf that rivals that of a professional baker. The beauty lies in the long fermentation process, which develops deep flavors and a delightful texture, offering a satisfying homemade experience.
As you explore this easy method, embrace the variations and let your creativity shine. Each loaf tells a unique story, reflecting your kitchen adventures. So, gather your ingredients, share with friends or family, and enjoy the delightful aroma and taste of your very own no knead artisan bread. Happy baking!
Print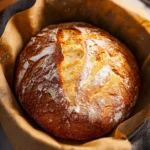
No-Knead Bread
- Total Time: 4 hours 45 minutes
- Yield: 1 loaf 1x
Description
This no-knead bread is easy to make and requires minimal hands-on time. Just mix the ingredients and let it rise!
Ingredients
Scale
- 3 cups all-purpose flour
- 2 teaspoons coarse sea salt
- 1/2 teaspoon active dry yeast (or instant yeast)
- 1 1/2 cups warm water (about 110 degrees F)
Instructions
- In a large mixing bowl, combine flour, salt, and yeast. Pour in warm water and stir with a wooden spoon until well combined. The dough will be sticky. Cover the bowl and allow it to rise at room temperature for 3-4 hours, or in the refrigerator for up to 15 hours.
- Scoop dough onto a floured work surface and shape into a ball. Sprinkle a tiny bit of flour on top of the dough ball and place it on a piece of parchment paper. Cover the dough with a dry kitchen towel. Allow to rise for 30 minutes.
- Meanwhile, place an empty dutch oven/cast iron pot, with the lid on, into the oven and preheat oven to 450 degrees F.
- Uncover dough and lift the parchment paper, with the dough on it, into your hot pan that’s been preheating in the oven. Cover with lid and return to oven to bake for 30 minutes.
- After 30 minutes, remove lid and bake, uncovered for about 15 more minutes, until golden on top. Remove from oven and allow bread to cool on a wire cooling rack.
- Store bread in an open paper bag on the counter for up to 1 week.
Notes
- Scoring the bread is optional, but can help with the final rise and appearance of the crust.
- Prep Time: 4 hours
- Cook Time: 45 minutes
- Category: Bread
- Method: Baking
- Cuisine: American
Nutrition
- Serving Size: 1 slice
- Calories: 120
- Sugar: 0g
- Sodium: 300mg
- Fat: 0.5g
- Saturated Fat: 0g
- Unsaturated Fat: 0g
- Trans Fat: 0g
- Carbohydrates: 24g
- Fiber: 1g
- Protein: 4g
- Cholesterol: 0mg