Follow Me On Social Media!

Homemade Twix Bars: Irresistibly Sweet and Easy to Make!
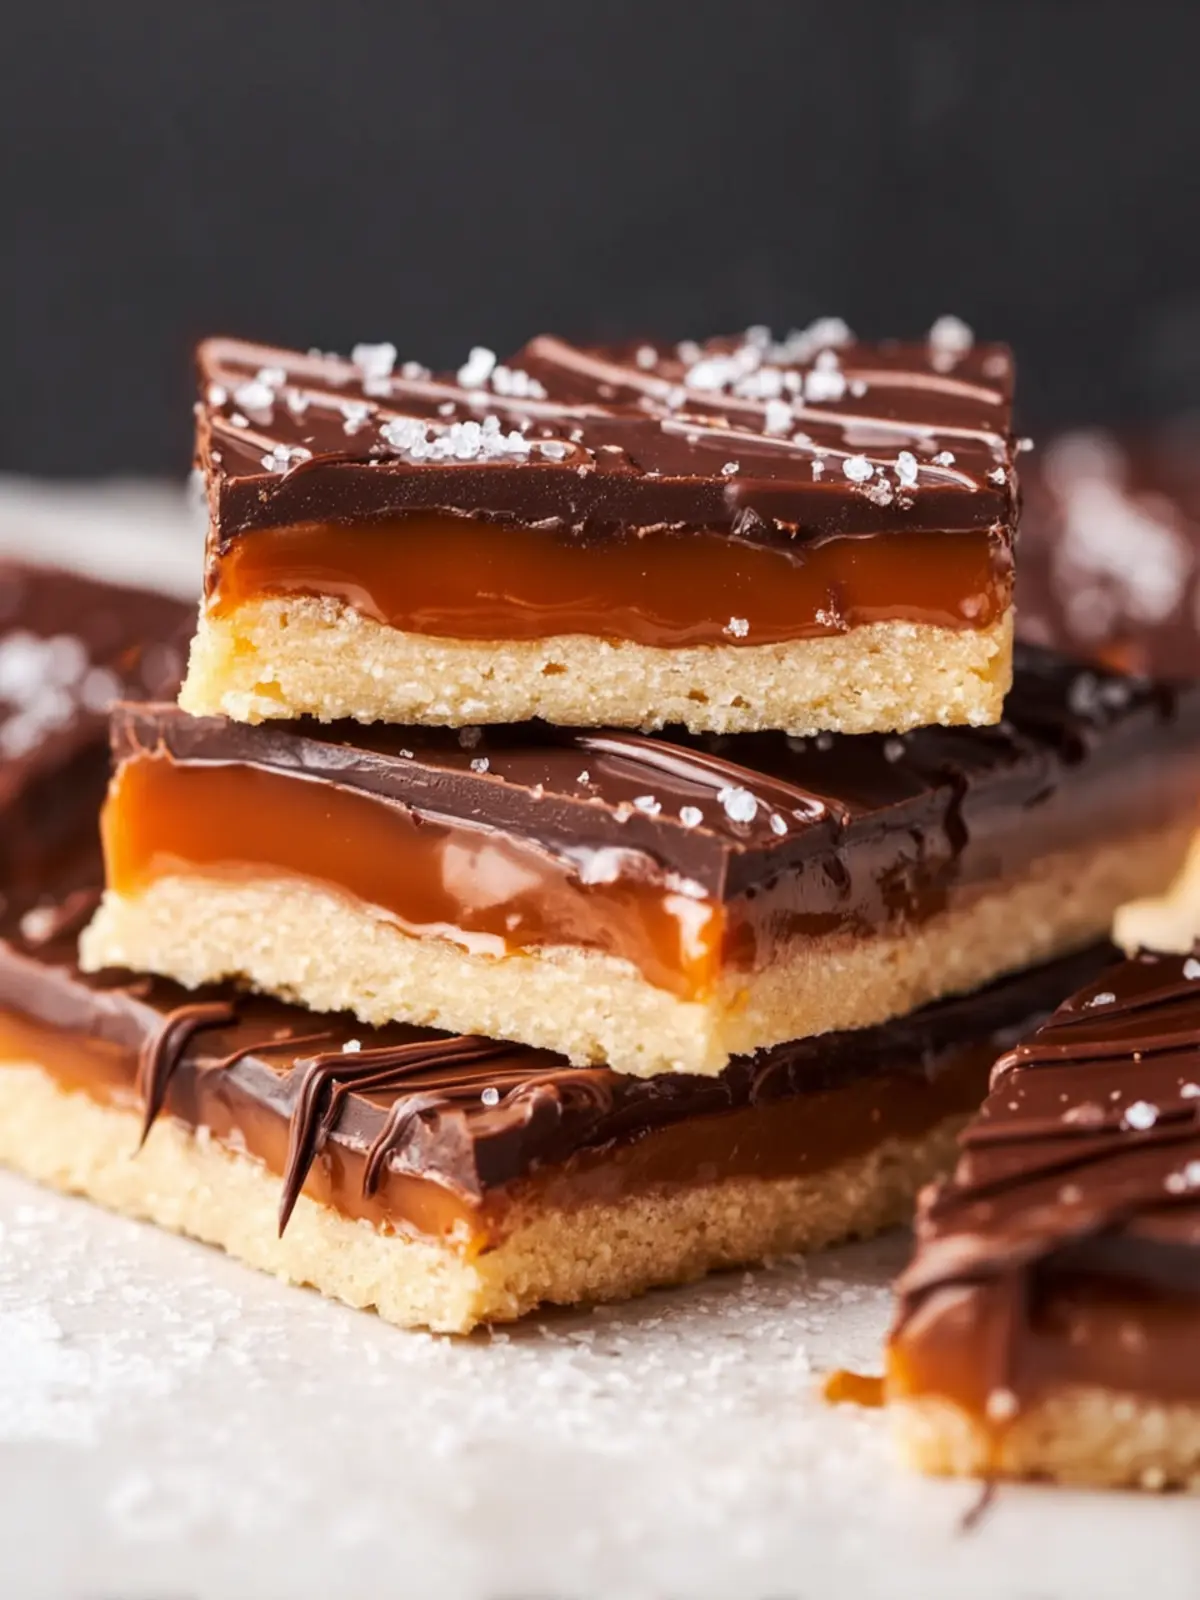
Introduction to Homemade Twix Bars
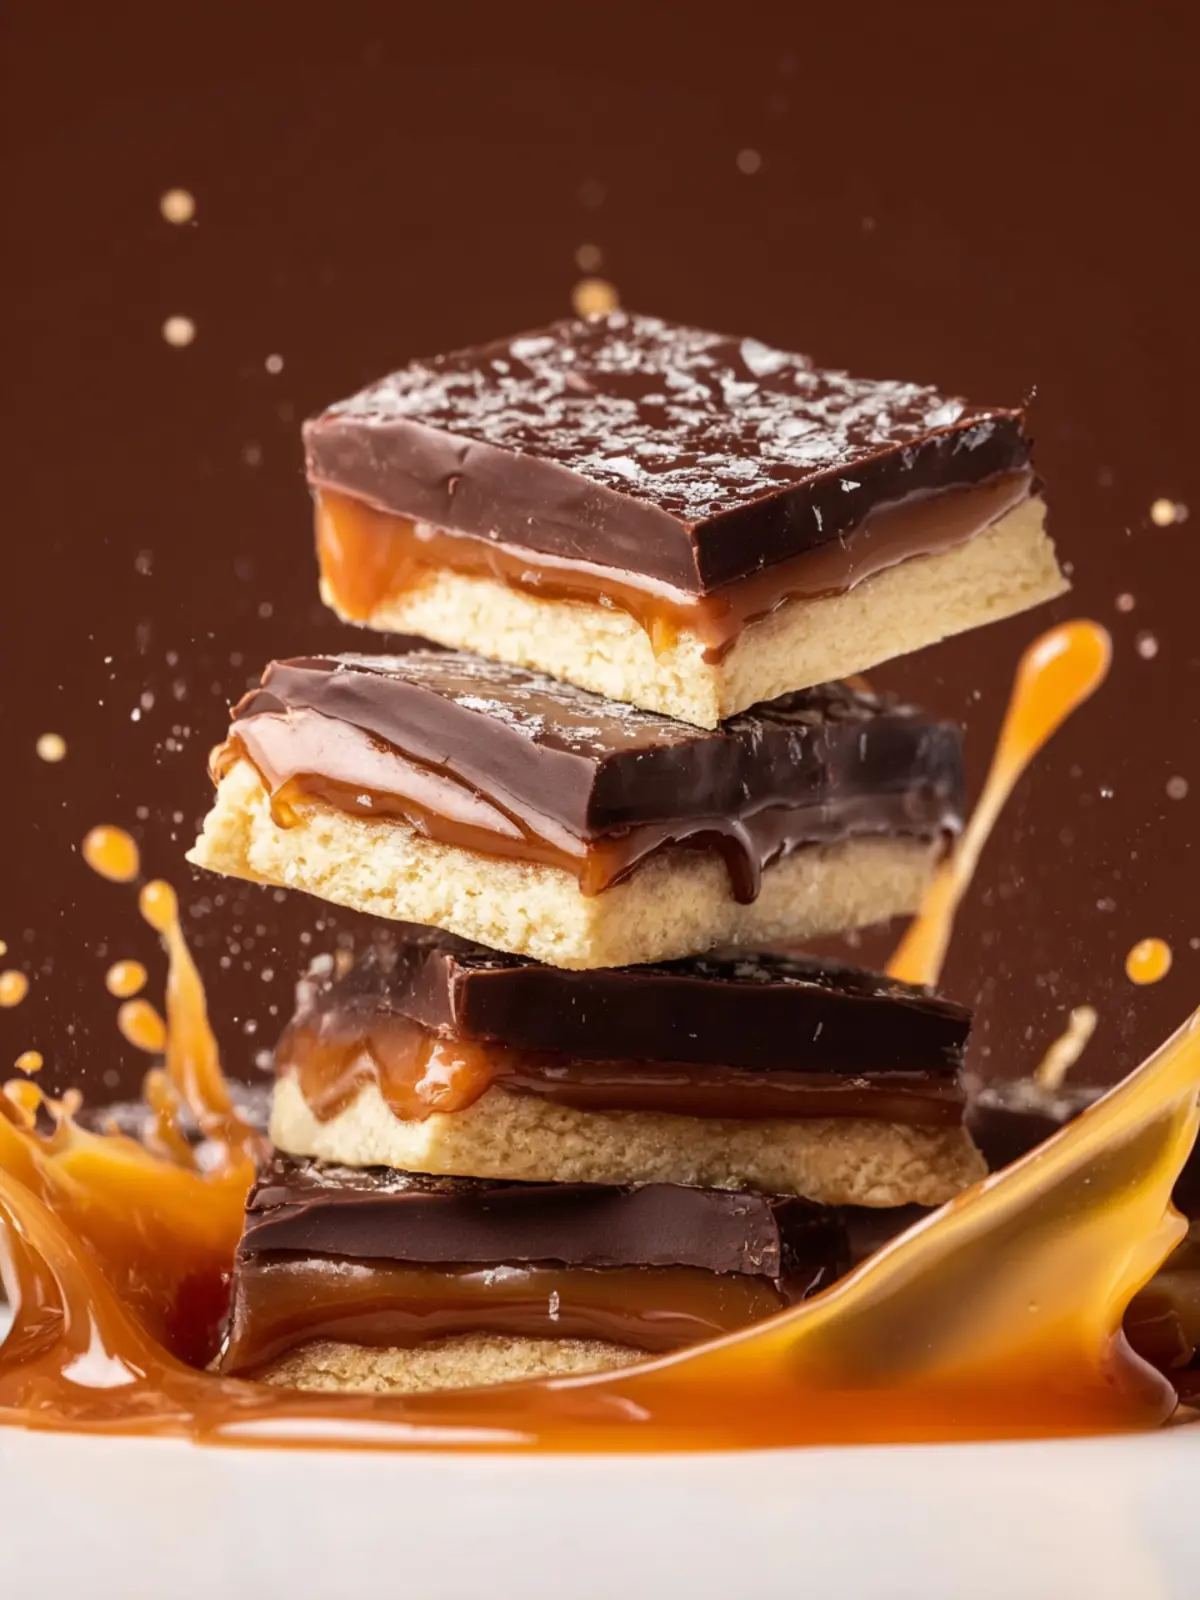
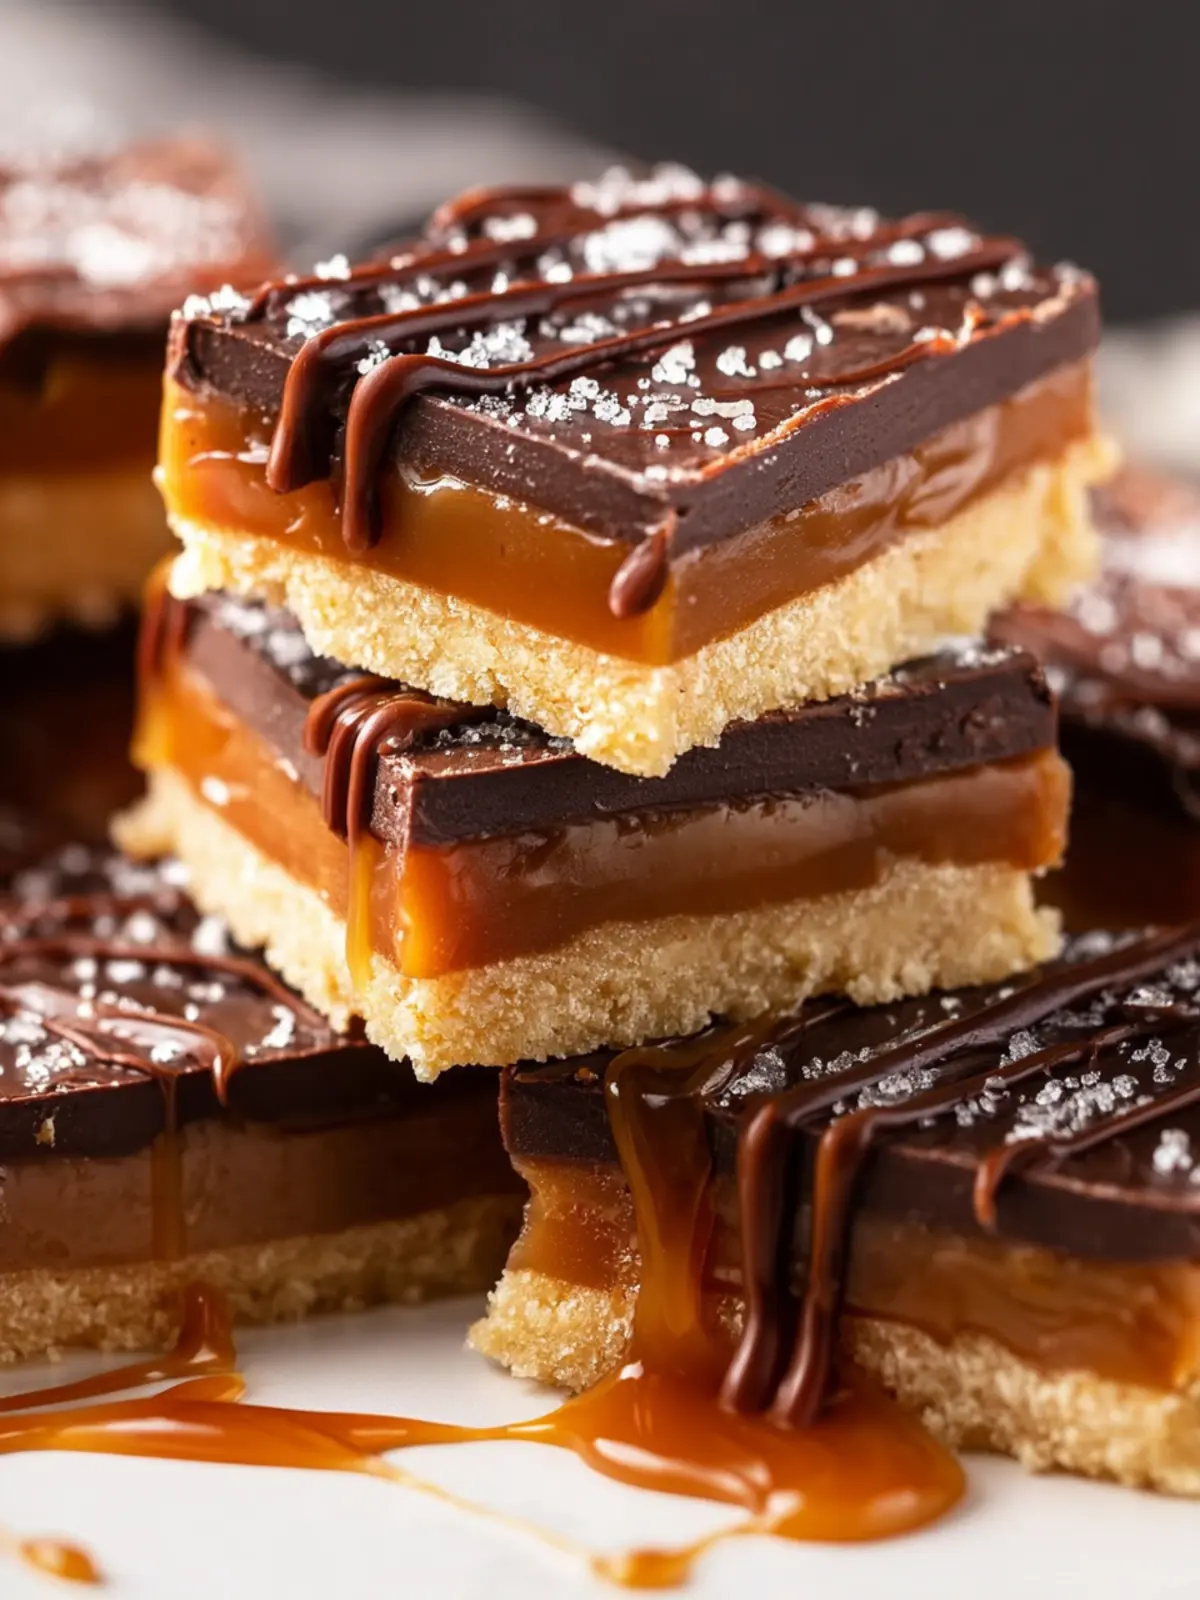
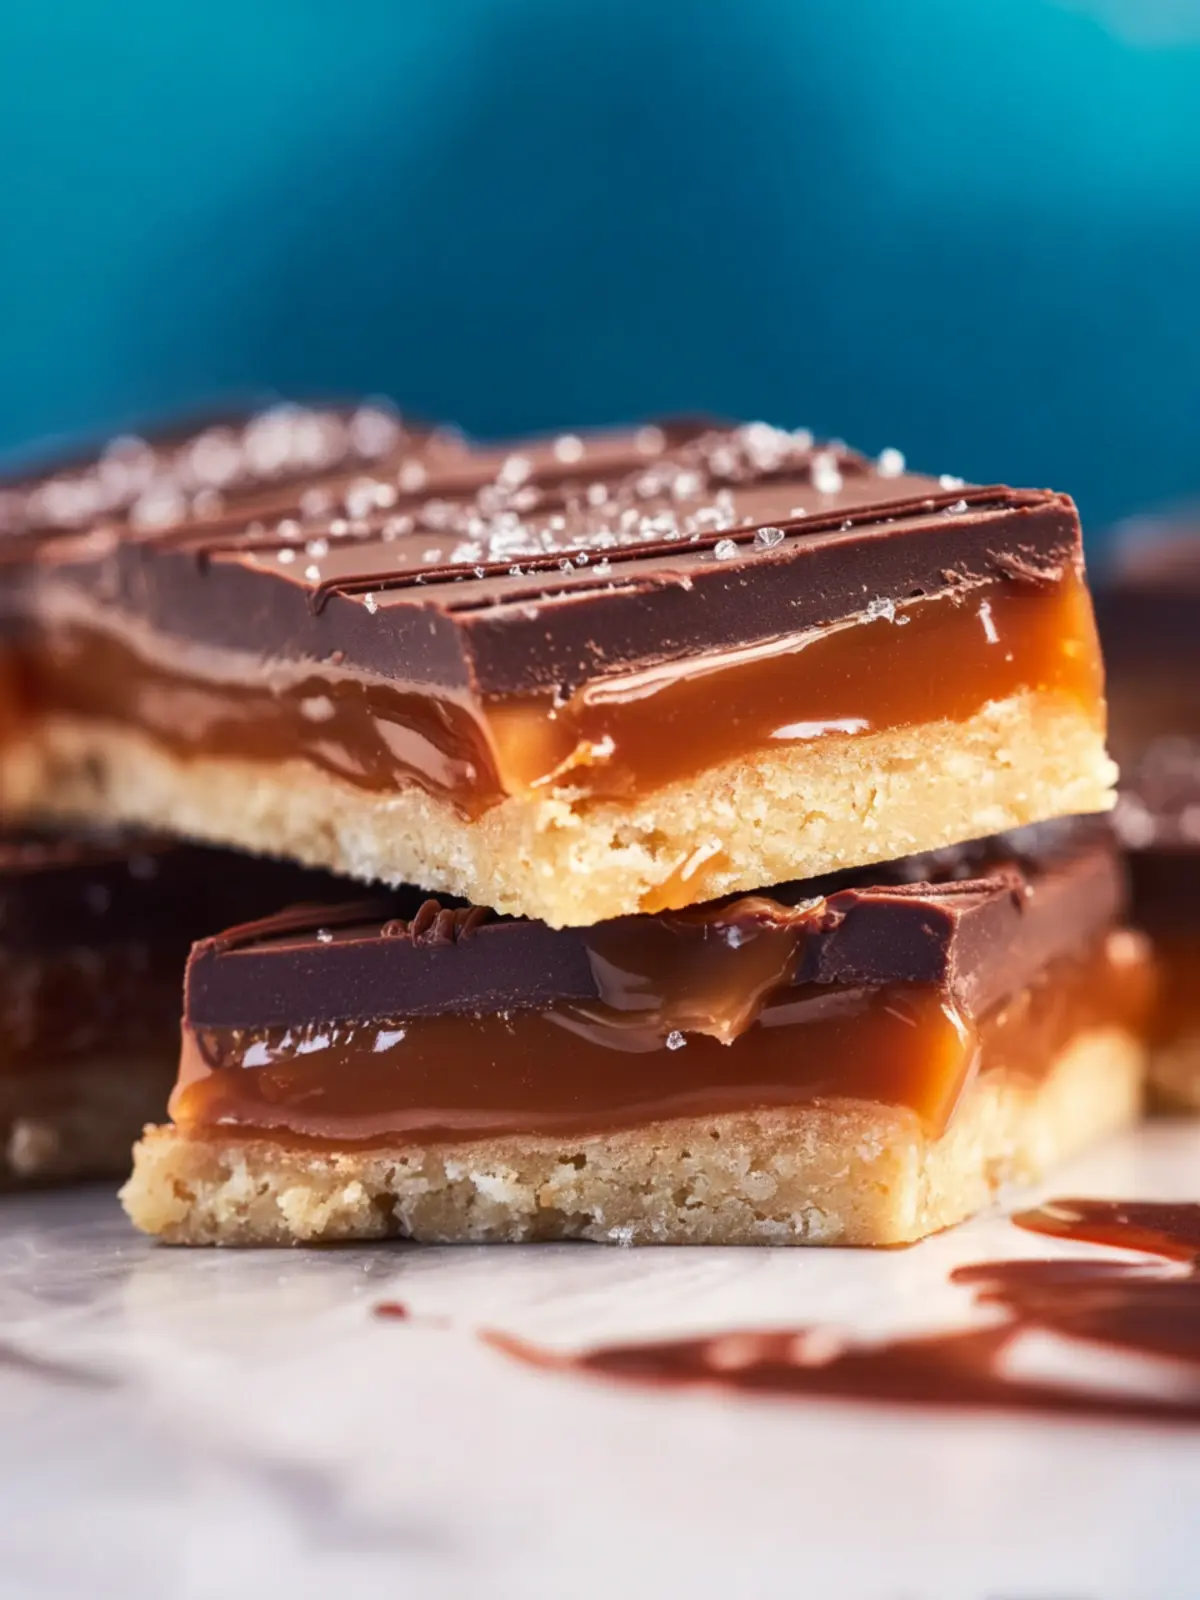
Imagine sinking your teeth into a decadent, chewy treat that captures the essence of chocolate, caramel, and crispy goodness all in one bite—this is the magic of homemade Twix bars. As a child, I remember saving my allowance for a chewy pack of Twix from the local candy store; the combination of flavors was simply unmatched. Fast forward to today, and I’ve found that recreating this beloved candy at home is not only an enjoyable culinary adventure but also a way to craft a homemade version that can be tailored just to your liking.
What makes homemade Twix bars a go-to treat? For starters, they offer a delightful balance of textures and flavors. The base is a buttery shortbread that melts in your mouth, paired beautifully with a luscious layer of caramel. All of this is covered in a rich layer of chocolate, creating a treat that’s ideal for sharing—or keeping all to yourself! Making these bars from scratch is also an opportunity to control the quality of ingredients, ensuring each bite is as scrumptious as can be.
What’s perhaps most rewarding is the joy of sharing them with friends or family. Picture this: a cozy afternoon gathering where you can present your homemade Twix bars alongside a steaming cup of coffee or tea. The look of surprise and delight on your loved ones’ faces when they realize they’ve just bitten into your homemade creation is priceless.
In addition, making homemade Twix bars can be a fun weekend project, perfect for inviting friends over for a baking session or teaching your kids some kitchen skills. As you work together to melt, mix, and layer, you’ll create not just a delicious treat but also cherished memories.
So roll up your sleeves, gather your ingredients, and let’s dive into making these incredible homemade Twix bars—the perfect combination of nostalgia and indulgence awaits!
Key Ingredients for Homemade Twix Bars
Butter: The secret ingredient for a rich and creamy base. In our homemade Twix bars, butter is pivotal not just for flavor but to achieve that perfect melt-in-your-mouth texture. It forms the foundation of the shortbread crust, adding a slight nuttiness that pairs beautifully with the other elements.
Granulated Sugar: Sweetens the shortbread, creating a melt-in-your-mouth experience. The sugar not only enhances the sweetness but also contributes to that delightful crunch of the crust. You’ll appreciate how it balances with the richness of the chocolate.
Vanilla Extract: Adds a fragrant depth of flavor to the bars. A splash of pure vanilla elevates the overall profile, making each bite feel indulgent. It’s a subtle touch that transforms a simple treat into a gourmet experience.
All-Purpose Flour: The foundation for our delightful shortbread. This ingredient provides structure, ensuring that the bars hold their shape while being tender and flaky. It’s essential for achieving the authentic shortbread feel.
Soft Caramel Candies: The heart of our bars brings sticky sweetness. You can’t have homemade Twix bars without this gooey goodness! The caramel not only adds sweetness but also a lovely chewy texture that contrasts nicely with the crunchy crust.
Heavy Cream: Ensures a smooth and luscious caramel layer. Mixing in heavy cream with the caramel candies helps achieve that creamy consistency, allowing the caramel to be spreadable and not overly tough.
Milk Chocolate Chips: Provides that classic chocolate layer everyone loves. The rich chocolate not only offers that iconic taste associated with Twix bars but also contrasts perfectly with the buttery shortbread and sweet caramel.
Coconut Oil: Helps create a glossy finish and smooth mouthfeel. This adds a sheen to the chocolate coating, making your bars look as enticing as they taste.
Flaky Sea Salt (optional): Elevates sweetness with a hint of saltiness. A sprinkle on top of the chocolate layer heightens the flavors and adds the perfect finishing touch, making the taste experience even more dynamic.
Now you are equipped with all the essentials to whip up your very own batch of homemade Twix bars. Enjoy the process as much as the delicious outcome!
Why You’ll Love This Homemade Twix Bars Recipe
Crafting your own homemade Twix bars can feel like taking a delightful stroll down memory lane. Remember the joy of savoring that perfect combination of crunchy cookie, luscious caramel, and smooth chocolate? Now imagine recreating that joy right in your own kitchen! This recipe not only satisfies your sweet tooth but also allows you to customize each layer to your liking.
The Perfect Crunch and Chew
One of the standout features of this homemade recipe is the texture; each bite offers a beautiful contrast between the crispy shortbread layer and the soft, gooey caramel. Have you ever had a piece of candy that was too chewy? With this recipe, you control the texture, ensuring the caramel isn’t overly hard or sticky.
Engaging Family Fun
This isn’t just about the end product; it’s an excellent opportunity to bring friends or family into the kitchen. Kids love helping with the caramel layer, and adults will appreciate the art of tempering chocolate. Imagine the laughter and creativity that flows while making these treats—the experience is as delightful as the result!
Healthier Alternative
While indulgent, these homemade Twix bars can be made with higher-quality ingredients. Using organic chocolate or homemade caramel allows you to enjoy a delicious treat that feels a bit more wholesome. And let’s be honest, who doesn’t love guilt-free sweets?
Variations of Homemade Twix Bars
Creating homemade Twix bars offers endless opportunities for experimentation and personalization, making it not just a recipe, but a delightful adventure in your kitchen. Here are a couple of fun variations to elevate your treat-making experience.
Gluten-Free Option
If you’re aiming for a gluten-free version of homemade Twix bars, swapping out regular flour is an easy fix. I recommend using a certified gluten-free all-purpose flour blend. These blends are often designed to behave similarly to traditional flour and will maintain the delicious texture of your bars. When substituting, ensure you check the blend’s ratios, as some might require a slight adjustment in liquid ingredients.
Flavor Twists
One of the joys of making homemade Twix bars is the ability to experiment with flavors. Trying out different chocolate types is a must! Dark chocolate adds a rich, intense flavor, while white chocolate offers a sweeter vibe. For an extra crunchy texture, consider incorporating nuts like chopped almonds or hazelnuts either within the caramel layer or sprinkled on top. This not only adds a pop of flavor but also a delightful crunch that complements the creamy caramel perfectly.
So whether you’re gluten-free or just in the mood for a flavor twist, these variations will take your homemade Twix bars to the next level!
Cooking Tips and Notes for Homemade Twix Bars
Making homemade Twix bars at home can be a rewarding experience, unleashing your creativity in the kitchen! With the right tricks up your sleeve, you can replicate those iconic flavors perfectly.
Achieving the Perfect Shortbread: Tips for Texture and Flavor
The foundation of your homemade Twix bars is, of course, the shortbread. For a truly delicious texture, mix your butter and sugar until light and fluffy—this creates that airy, crumbly feel. Be sure to use cold butter to avoid making the dough too soft. When rolling out the dough, aim for a thickness of about 1/4 inch for the right balance between crunch and tenderness. A sprinkle of salt enhances the flavor beautifully, making each bite even more delectable.
Caramel Secrets: How to Avoid Grainy Caramel
To achieve that smooth, gooey caramel layer, gentle heating is key. Use a heavy-bottomed saucepan and keep the heat on low to medium. Stir constantly to prevent any sugar from crystalizing. If you’ve added your cream too quickly, you might end up with grainy caramel, so add it in gradual increments.
Chocolate Melting Techniques: Microwave vs. Double Boiler
When it comes to melting chocolate for your homemade Twix bars, both methods have their merits. The microwave is quick and convenient; just heat the chocolate in 30-second intervals, stirring in between to prevent overheating. If you prefer a double boiler, set the chocolate in a bowl over simmering water, which allows for even melting without the risk of burning. Choose whichever method feels more comfortable for you!
With these tips, your homemade Twix bars will shine with flavor and texture that rivals the originals! Happy baking!
Serving Suggestions for Homemade Twix Bars
Indulging in your own homemade Twix bars is an experience worth sharing, but how do you elevate that joy for your friends and family? Let’s dive into some delightful serving suggestions that will impress at gatherings and enhance your sweet treat experience.
Creative Presentation Ideas
When serving your homemade Twix bars, consider a simple yet elegant presentation. Arrange the bars on a cake stand to create a focal point. You might also cut them into smaller bite-sized pieces for easy sharing. Wrapping each piece in colorful paper or placing them in decorative boxes adds a special touch, perfect for party favors or hostess gifts.
Pairings to Enhance Flavor
Transform your homemade treat into a delightful dessert pairing. A cup of rich coffee or a glass of creamy milk complements the chocolate and caramel beautifully. For those who enjoy a twist, try pairing your Twix bars with herbal teas like chamomile, or a tart raspberry lemonade. The tangy notes will balance the sweetness of the bars, bringing all flavors into harmony. Enjoying these bars with friends just got even sweeter!
Time Breakdown for Homemade Twix Bars
Creating your own homemade Twix bars can be a delightful project that’s totally worth the time. Here’s how the timing breaks down:
Preparation time
In about 30 minutes, you can gather your ingredients, mix the base, and prepare for the next steps. It’s the perfect time to crank up your favorite playlist and get your kitchen prepped.
Cooking time
The cooking process takes approximately 20 minutes. While your layers come together, you can use this time to daydream about that sweet layer of chocolate to come.
Cooling time
Allow about 2 hours for cooling. This step is key to achieving that delightful crunch and soft caramel without a mess.
Total time
All in all, you’re looking at around 2 hours and 50 minutes from start to finish. But trust me, each minute spent will lead to an irresistible experience of homemade Twix bars.
Nutritional Facts for Homemade Twix Bars
When you sink your teeth into homemade Twix bars, you may wonder about the nutritional profile of this indulgent treat. By making these sweet delights at home, you not only control the ingredients but also get a better understanding of what fuels your body.
Calories and macronutrients
Each serving of homemade Twix bars typically contains around 200 calories, with a nutritious balance of carbohydrates, fats, and proteins. Expect approximately 12 grams of fat, 24 grams of carbs, and 3 grams of protein, making these bars a delightful yet guilt-free dessert option.
Ingredients breakdown (per serving)
- Shortbread Base: This forms the foundation of your homemade Twix bars, providing a crisp texture. Made with butter and flour, it delivers a delightful crunch.
- Caramel Layer: Rich and gooey, this layer is made from natural sweeteners, helping to elevate the sweetness without the excess guilt.
- Chocolate Coating: Dark chocolate adds a decadent finish. Packed with antioxidants, it’s a healthier choice that still satisfies your sweet tooth.
Homemade treats like these not only bring a sense of nostalgia but also allow you to enjoy a favorite snack with peace of mind.
FAQ about Homemade Twix Bars
Creating your own homemade Twix bars is not just about indulging in a delicious treat—it’s a delightful journey into flavor and texture that you can share with family and friends. Let’s dive into some of the most common questions you might have as you embark on making these delectable bars.
Can I make these bars ahead of time?
Absolutely! Making homemade Twix bars ahead of time is a fantastic way to save time, especially for events or when you crave a sweet treat. Simply prepare the bars, allow them to cool completely, and then store them in an airtight container. They can be kept in the fridge for up to a week or in the freezer for longer. Just make sure to separate layers with parchment paper to prevent sticking.
What’s the best way to store Homemade Twix Bars?
To keep your homemade Twix bars fresh, it’s best to store them in an airtight container at room temperature for a few days. If you plan to keep them longer, refrigerate them to extend their lifespan. Just remember, the colder temperature may slightly alter the texture, so allow them to sit at room temperature for a few minutes before enjoying.
How can I customize the flavor?
The beauty of homemade Twix bars lies in their versatility! You can experiment with different flavored chocolates, such as dark or white chocolate. Moreover, try adding a pinch of sea salt on top for that perfect sweet-and-savory combination, or incorporate a bit of vanilla extract into your caramel for a delightful twist.
Are there any alternative toppings for this recipe?
Certainly! If you’re looking to give your homemade Twix bars a unique flair, consider topping them with chopped nuts, drizzled caramel, or even crushed cookies for texture. Coconut flakes can also add an exotic touch. The possibilities are endless, so feel free to get creative with your toppings!
Conclusion on Homemade Twix Bars
Crafting your own homemade Twix bars not only satisfies your sweet tooth but also allows for a personal touch that store-bought versions simply can’t match. With layers of buttery shortbread, smooth caramel, and rich chocolate, each bite is a delightful balance of flavors. Plus, making these bars at home means you can adjust the sweetness and texture to your liking. Whether you’re hosting a gathering or enjoying a quiet night in, sharing these treats will undoubtedly make your experience sweeter. So gather your ingredients and indulge in the joy of creating these delicious delights from scratch!
Print
Chocolate Caramel Shortbread Bars
- Total Time: 1 hour 18 minutes
- Yield: 16 bars 1x
- Diet: Vegetarian
Description
Deliciously rich shortbread bars topped with a creamy layer of caramel and a smooth chocolate coating.
Ingredients
Scale
- ¾ cup butter (softened)
- ⅓ cup granulated sugar
- 1 teaspoon vanilla extract
- 1 ½ cups all-purpose flour
- 11 ounces soft caramel candies (unwrapped)
- 3 Tablespoons heavy cream
- 12 ounces milk chocolate chips (or semi-sweet)
- 1 Tablespoon coconut oil
- to taste flakey sea salt (optional)
Instructions
- Preheat your oven to 375℉. Add the softened butter and granulated sugar to the bowl of a stand mixer fitted with the paddle attachment. Beat on medium-high speed for 2-3 minutes, or until the mixture is light and fluffy.
- Next, mix in the vanilla and then add the flour gradually. Mix just until all of the flour is incorporated.
- Line a 8×8 baking dish with parchment paper. Pat the dough into the dish.
- Bake for 15-18 minutes, or until the edges are starting to turn golden brown. Set aside to cool.
- Add the soft caramels and heavy cream to a small saucepan over medium heat. Cook, stirring often, until melted- about 5 minutes. Pour over the shortbread base.
- Place the shortbread and caramel in the fridge to cool until set, about 45 minutes.
- Combine the chocolate and coconut oil in a small microwave-safe bowl. Microwave for 30 second intervals, stirring after each, until fully melted. Pour over the hardened caramel and top with flake sea salt, if using.
- Place the bars back into the fridge to chill until the chocolate has fully set- about 45 minutes.
- When the chocolate has fully hardened, let the bars sit at room temp for 10 minutes then slice the bars into your desired size and enjoy.
Notes
- Make sure to use softened butter for the best texture.
- For a more indulgent treat, use semi-sweet chocolate chips.
- Prep Time: 15 minutes
- Cook Time: 18 minutes
- Category: Dessert
- Method: Baking
- Cuisine: American
Nutrition
- Serving Size: 1 bar
- Calories: 250
- Sugar: 18 grams
- Sodium: 120 mg
- Fat: 14 grams
- Saturated Fat: 8 grams
- Unsaturated Fat: 4 grams
- Trans Fat: 0 grams
- Carbohydrates: 30 grams
- Fiber: 1 gram
- Protein: 2 grams
- Cholesterol: 30 mg