Follow Me On Social Media!


Homemade Gluten Free Pizza Dough: The Best Recipe Ever!
Introduction to Homemade Gluten Free Pizza Dough
Imagine the enticing aroma of freshly baked pizza wafting through your kitchen, enticing everyone to gather around the table. The secret? It starts with homemade gluten free pizza dough. Crafting your own pizza dough at home isn’t just a fun culinary adventure; it’s a gateway to health-conscious dining that doesn’t skimp on flavor. From the moment the dough’s ingredients mix together, you can feel the excitement building as you think of all the unique toppings you’ll add.
Why settle for store-bought options filled with preservatives when you can create a fresh, made-from-scratch base? Homemade gluten free pizza dough allows you to customize every aspect to suit your taste buds or dietary needs. Plus, it’s a fabulous way to bring family and friends together by involving them in the pizza-making process. Picture everyone with flour-dusted hands, enjoying each other’s company as they top their own personal pizzas before baking them to golden perfection.
Why homemade pizza dough is a game-changer
Choosing to make your own homemade gluten free pizza dough empowers you with control over the ingredients. Many pre-packaged gluten free doughs have fillers and additives that can detract from their quality and flavor. By crafting your dough at home, you’re able to use wholesome and natural ingredients, ensuring each bite is as fresh and nutritious as possible.
Furthermore, exploring this DIY journey unlocks a broader culinary experience. You can experiment with various gluten-free flour blends like almond flour, rice flour, or even a combination tailored to your flavor preference. Have you ever thought about adding herbs or spices directly into the dough? Maybe a pinch of garlic powder or some Italian herbs can elevate your pizza from good to gourmet!
There’s something incredibly satisfying about kneading dough and watching it rise, evoking a sense of accomplishment that’s hard to replicate. So, gather your ingredients, roll up your sleeves, and get ready to create a pizza night that will not only fill your belly but also make lasting memories.

Key Ingredients for Homemade Gluten Free Pizza Dough
Creating a delicious homemade gluten free pizza dough is all about selecting the right ingredients that yield the perfect base for your favorite toppings. Here’s what you’ll need:
-
Gluten Free Flour Blend: A good blend is essential. I recommend a mix that includes brown rice flour, tapioca flour, and potato starch. This combination provides a chewy texture while maintaining that classic pizza crust feel.
-
Xanthan Gum: This ingredient is a must! It acts as a binding agent, helping to mimic gluten’s elasticity. If you’re using a blend that already contains xanthan gum, you can skip this.
-
Warm Water: Just the right temperature (about 110°F) activates the yeast and ensures the dough rises properly. Too hot or cold, and your dough may not rise.
-
Yeast: Active dry yeast is perfect here. It gives the dough that airy, light texture we all love in pizza crusts.
-
Olive Oil: This adds flavor and moisture, making your crust crispy on the outside while soft on the inside.
-
Salt: Don’t forget this key ingredient for enhancing the overall flavor of your dough.
Each component plays a role in crafting the best homemade gluten free pizza dough, transforming simple ingredients into a family favorite!
Why You’ll Love This Recipe
Ease of Preparation
Making homemade gluten free pizza dough is surprisingly simple, even if you think baking is a daunting task. With just a few basic ingredients, you can create a deliciously chewy crust from scratch. From mixing the dry ingredients to kneading the dough, the entire process takes less than an hour. Plus, there’s no waiting for yeast to rise, which means you can satisfy those pizza cravings in no time. Trust me, there’s a special satisfaction in crafting your own dough that a store-bought option just can’t replicate.
Customizable Toppings
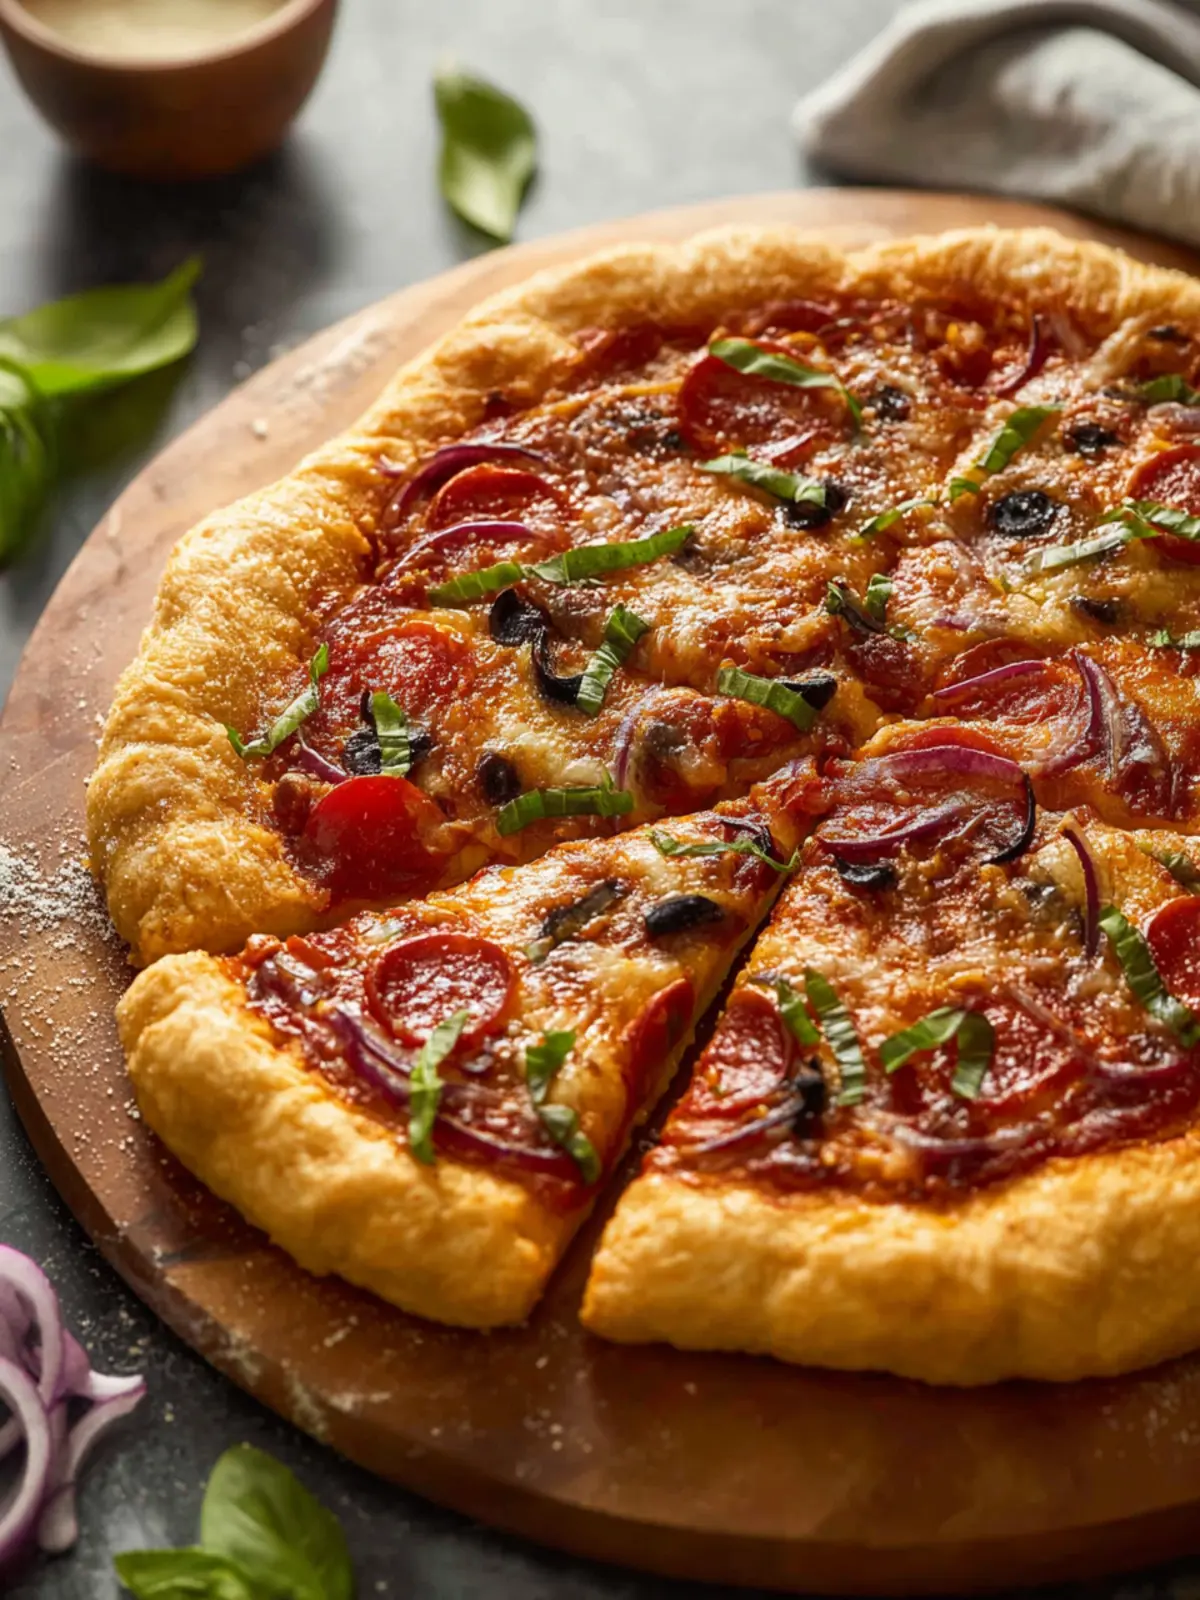
What’s great about pizza is the endless possibilities for personalization! Once you have your homemade gluten free pizza dough ready, the fun truly begins. Whether you’re a fan of classic margherita or adventurous flavors like barbecue chicken, this base is your canvas. Pile on your favorite cheeses, fresh veggies, and savory meats. You can even experiment with unusual toppings to impress friends at your next pizza night. The freedom to create a pizza that speaks to your taste is part of the joy!
Healthy and Wholesome
Another reason you’ll love this recipe is the peace of mind that comes from knowing exactly what’s in your food. By making your homemade gluten free pizza dough, you control the ingredients, which means no preservatives or hidden additives. You can choose high-quality flours, add herbs and spices, and use fresh toppings. This way, your pizza isn’t just a delicious treat; it’s a wholesome meal that you can feel good about serving to yourself and your loved ones.
Tips for Perfecting Your Pizza Dough
Creating the ultimate homemade gluten free pizza dough can feel like an art form, but with a few essential tips, you’ll be crafting perfect pies in no time.
Correct Kneading Techniques
When handling your homemade gluten free pizza dough, kneading is key to achieving the right texture. Unlike traditional dough, gluten-free flour might need a bit more attention. Use your hands or a dough scraper to combine the ingredients thoroughly, ensuring a smooth texture. Gently knead the dough for about 5–7 minutes until it becomes elastic and cohesive. Don’t rush the process; let your intuition guide you!
Importance of Dough Proofing
Proofing your dough is a crucial step that many might overlook. Allow your homemade gluten free pizza dough to rest for at least 30 minutes. This step is essential as it helps develop flavors and gives the dough a chance to rise. You can cover it with a damp cloth to keep it from drying out. Trust me—it makes all the difference!
Temperature Control for Cooking
Just like in a bustling pizzeria, temperature control is vital for the perfect pizza crust. Preheat your oven to a high temperature, ideally between 475°F to 500°F. This ensures that your homemade gluten free pizza dough cooks evenly and becomes delightfully crispy. Consider using a pizza stone for that extra touch—this helps retain heat and mimics a traditional brick oven environment, enhancing your pizza experience.
With these tips in hand, you’re well on your way to mastering the art of pizza making. Happy baking!
Time Details for Homemade Gluten Free Pizza Dough
When the craving for a delicious, crispy slice of homemade gluten free pizza dough strikes, it’s good to know how long the whole process will take. Here’s a breakdown of the time involved to help you plan your pizza night.
Preparation time
Getting your dough ready takes about 15 minutes. This includes measuring your ingredients and mixing them to form the perfect dough consistency.
Proofing time
Allow the dough to proof for about 1 hour. This step is crucial as it helps the gluten-free flours develop the right texture and flavor, giving your pizza a delightful rise.
Baking time
Once you’ve topped your pizza with your favorite ingredients, bake it for 15-20 minutes. This ensures a lovely golden crust that will make your taste buds rejoice.
Total time
In total, you’re looking at around 1 hour and 35 minutes from start to delicious finish. Plan this out, and you’ll be ready to enjoy a homemade gluten free pizza that’s worth every minute!

Nutritional Information for Homemade Gluten Free Pizza Dough
Creating your own homemade gluten free pizza dough opens up a world of flavor and nutrition that you can tailor to your dietary preferences. It’s exciting to indulge in the pizza you love while keeping it healthy. Here’s a closer look at the nutritional benefits of your freshly made dough.
Calories
Each serving of homemade gluten free pizza dough contains approximately 180 calories. This makes it a relatively light option compared to traditional pizza dough, allowing you to enjoy more toppings without guilt!
Fiber
Packed with dietary fiber, each serving provides around 4 grams. This is excellent for promoting good digestion and keeping you feeling full, making it a satisfying choice for pizza night.
Protein
For those looking to boost their protein intake, enjoy about 6 grams per serving of this delicious dough. This is vital for muscle repair and overall health, especially if you’re leading an active lifestyle.
With these nutritional insights, you can feel good about indulging in a slice or two of your favorite gluten free pizza!
FAQs about Homemade Gluten Free Pizza Dough
When diving into the world of homemade gluten free pizza dough, you might have a few questions swirling around in your mind. Cooking is all about experimenting and enjoying the process, so let’s clear up some common inquiries to make your pizza night a fantastic experience!
Can I make this dough ahead of time?
Absolutely! Making your homemade gluten free pizza dough ahead of time can save you significant fuss when it’s pizza night. Prepare the dough, knead it, and let it rise according to the recipe’s instructions. Once risen, you can refrigerate it for up to three days or freeze it for longer storage. Just remember to let it come to room temperature before rolling it out for those delicious toppings.
What toppings work best with gluten-free pizza dough?
When it comes to toppings, the sky’s the limit! Many people find that fresh vegetables like bell peppers, mushrooms, and spinach complement gluten-free pizza beautifully. You can also go classic with pepperoni or experiment with gourmet options like goat cheese and arugula. Don’t forget to consider different sauces — pesto and white sauce can be fantastic alternatives to traditional marinara.
How do I store leftover pizza dough?
If you have extra homemade gluten free pizza dough, storing it correctly is key to maintaining its freshness. First, wrap the dough tightly in plastic wrap or place it in an airtight container. Keep it in the refrigerator for up to three days or freeze it for later use. If freezing, it’s helpful to divide the dough into portions so you can pull out just what you need for your next pizza night!
Conclusion on Homemade Gluten Free Pizza Dough
In summary, enjoying your own homemade gluten free pizza dough is not only possible but incredibly satisfying. This recipe uses simple yet effective ingredients to create a crust that is crispy on the outside and chewy on the inside. Remember to experiment with different gluten-free flour blends for unique textures and flavors that suit your taste. Whether it’s a casual weeknight dinner or a gathering with friends, this pizza dough will elevate your meals while being kind to your diet. So roll up your sleeves and get ready to indulge in a delicious slice of homemade goodness.
Print
Gluten Free Pizza Crust
- Total Time: 1 hr 35 mins
- Yield: 2 pizzas 1x
- Diet: Gluten Free
Description
A delicious gluten free pizza crust made with psyllium husk for a great texture.
Ingredients
Scale
- 1 ¾ cup lukewarm water (420ml)
- 4 tbsp whole psyllium husk (20g)
- 2 ½ cup + 1 tbsp gluten free all purpose flour blend (360g)
- 2 ¼ tsp quick yeast (8g)
- 2 tsp salt
- 1 tbsp sugar
- 2 tsp apple cider vinegar
- 1 tbsp olive oil + more for the crust
Instructions
- Psyllium Gel: Mix water and psyllium husk together in a medium bowl. Set aside to thicken up as you prep the other ingredients.
- Flour Mixture: Whisk flour, yeast, salt and sugar together in a large bowl until well combined.
- Combine ingredients: Stir the apple cider vinegar and oil into the psyllium gel then add the wet ingredients to the dry ingredients. Mix together until fully combined. Make sure to scrape down the bottom and sides of the bowl every so often to get all the floury bits. Mix together until you end up with a thick, smooth, slightly sticky dough that easily clumps together.
- Knead & Divide: Lightly flour your hands and a clean work surface. Place dough on the floured surface and knead until soft and smooth. Divide into two equal sized dough balls. Set one ball aside and cover with a tea towel to keep from drying out while you work with the other.
- Shape: Add a bit more flour to your work surface. Starting with the first dough ball: press down on the dough with your hands to flatten into a disc. Gently pull and gradually stretch the dough out in a circular shape. Make sure to lift and turn the dough every so often to keep it from sticking to the worktop. Continue pressing and stretching the dough (starting from the center and moving out) until you end up with a 10-12 inch circle. Once big enough, carefully lift and transfer to a large, un-rimmed baking sheet or pizza screen (recommended). Stretch & flatten the dough out after transferring if needed to get it back in shape.
- Proof: Brush a bit of olive oil over the top of the crust, then cover with plastic wrap or a kitchen towel in a warm, draft free environment to let the dough rise – at least 1 hour. (See notes for overnight proof)
- Add Toppings & Bake: Preheat oven to 475°F (250°C) – heat for at least 15 minutes before adding pizzas to ensure it’s fully heated. Add your preferred pizza toppings. Place in the middle of the oven and bake for 12-15 minutes until the crust is a lightly golden brown. Remove from oven, slice & serve.
Notes
- You can prepare the dough in advance and let it rise overnight in the fridge for a more developed flavor.
- Experiment with different toppings to suit your taste.
- Prep Time: 20 mins
- Cook Time: 15 mins
- Category: Main Dish
- Method: Baking
- Cuisine: Italian
Nutrition
- Serving Size: 1 slice
- Calories: 180
- Sugar: 0g
- Sodium: 220mg
- Fat: 7g
- Saturated Fat: 1g
- Unsaturated Fat: 4g
- Trans Fat: 0g
- Carbohydrates: 27g
- Fiber: 3g
- Protein: 5g
- Cholesterol: 0mg